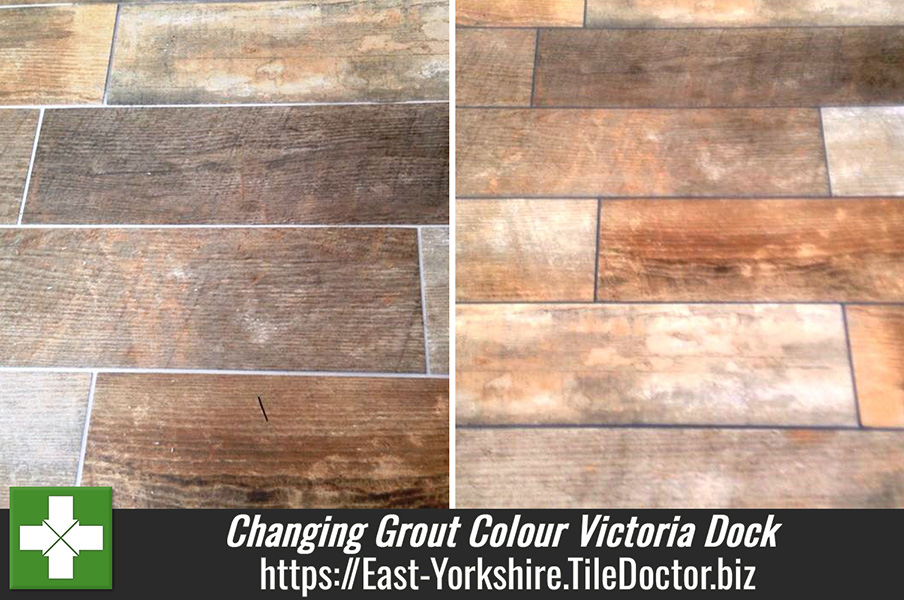
I recently went down to the city of Hull, the biggest in East Yorkshire, for this job after I was contacted by a client living in the Victoria Dock area. My client had a very nice wood effect Porcelain floor, but she was not happy with current colour of the grout, which was a light grey, and wanted it changed to a dark grey instead. The floor was very well maintained – with Porcelain being a highly resistant material – and so it did not require a deep clean itself. On this particular occasion, my main focus was on the grout.

Applying the pre-treatment cleaner
The Tile Doctor Grout Colourant kit consists of a pre-treatment cleaner and the colour seal, along with a grout brush and scrub pad to apply the products. My first task was to apply the pre-treatment cleaner to the grout. This prepares the grout joints for a superior grout colourant bond.

Changing the grout colour
The next stage of the re-colouring was to apply the grout colourant itself. I applied the dark grey colourant very carefully using an applicator brush, ensuring that it was distributed as evenly as possible along the grout lines.
 |
 |
I then left the grout to dry for a couple of hours, before using clean water in combination with a scrub pad to remove the excess. As you can see from the photographs, the overall result was a whole new look for the floor, with the dark grey colour accentuating the fantastic wood effect Porcelain, more so than the light grey had done previously.


Big difference, you can always rely on Tile Doctor to sort out the problems no one else will touch, after all – We Love the Jobs Tilers Hate