Author name: east-yorkshire

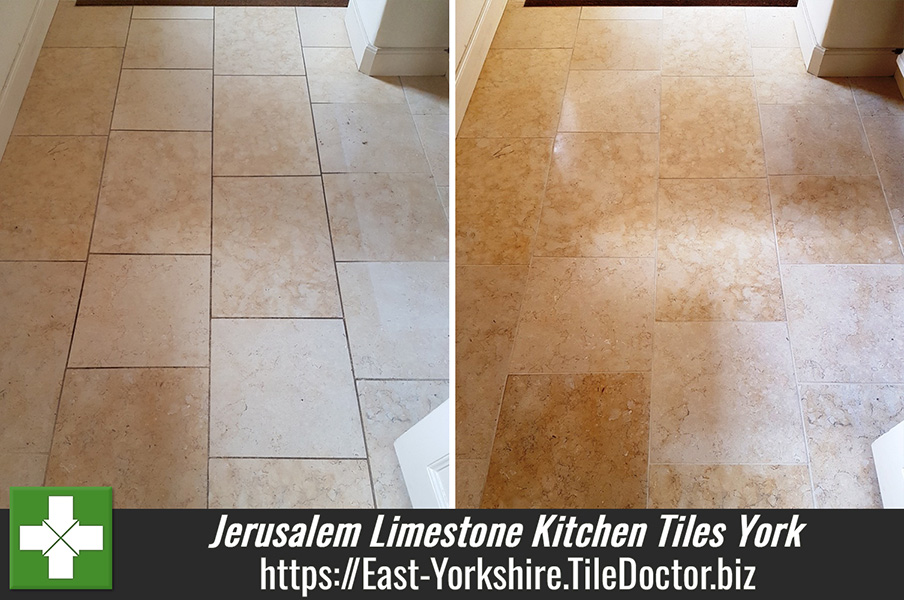
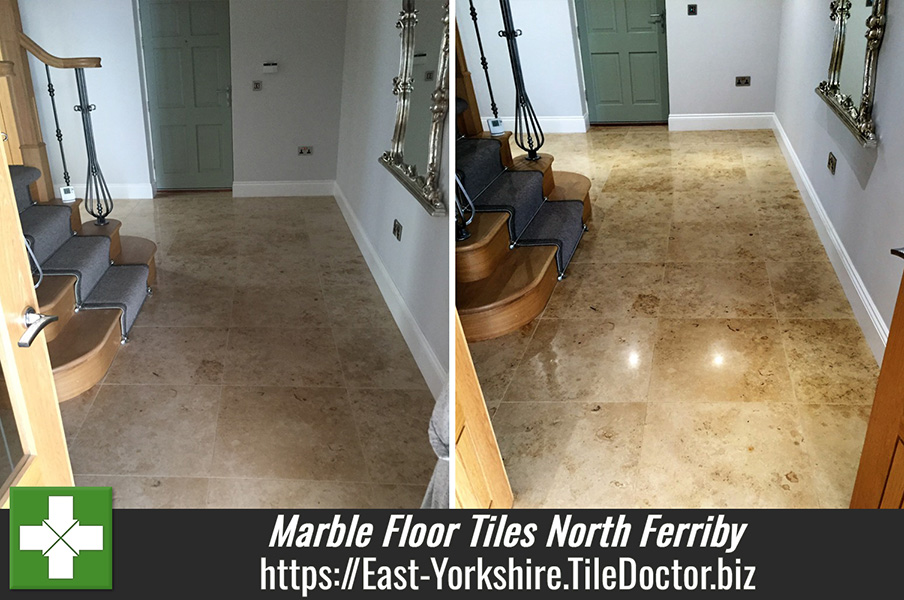
Jerusalem Limestone After Cleaning York

Renovating Jerusalem Limestone Kitchen Tiles in York

Jerusalem Stone is a pale variety of Limestone that comes from Israel and is available in different colours. It’s a high-quality material that has been used in construction for thousands of years however like all Stone used as flooring, it benefits from being sealed to prevent dirt from becoming ingrained in the stone.

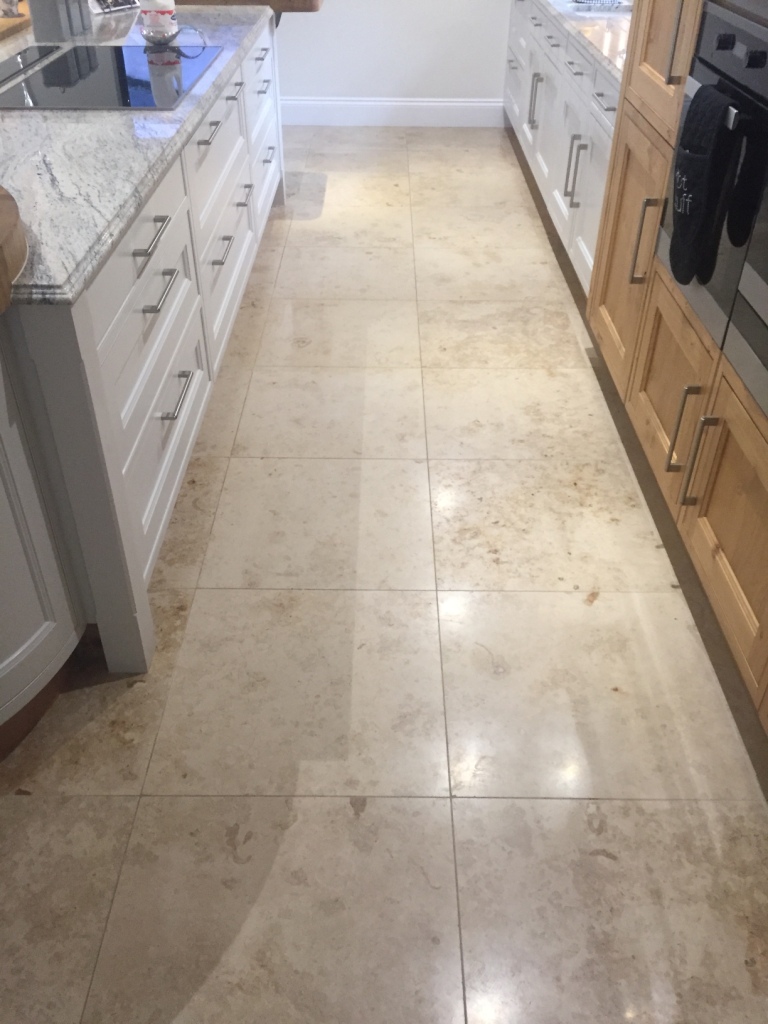
Jerusalem Limestone Before Cleaning York
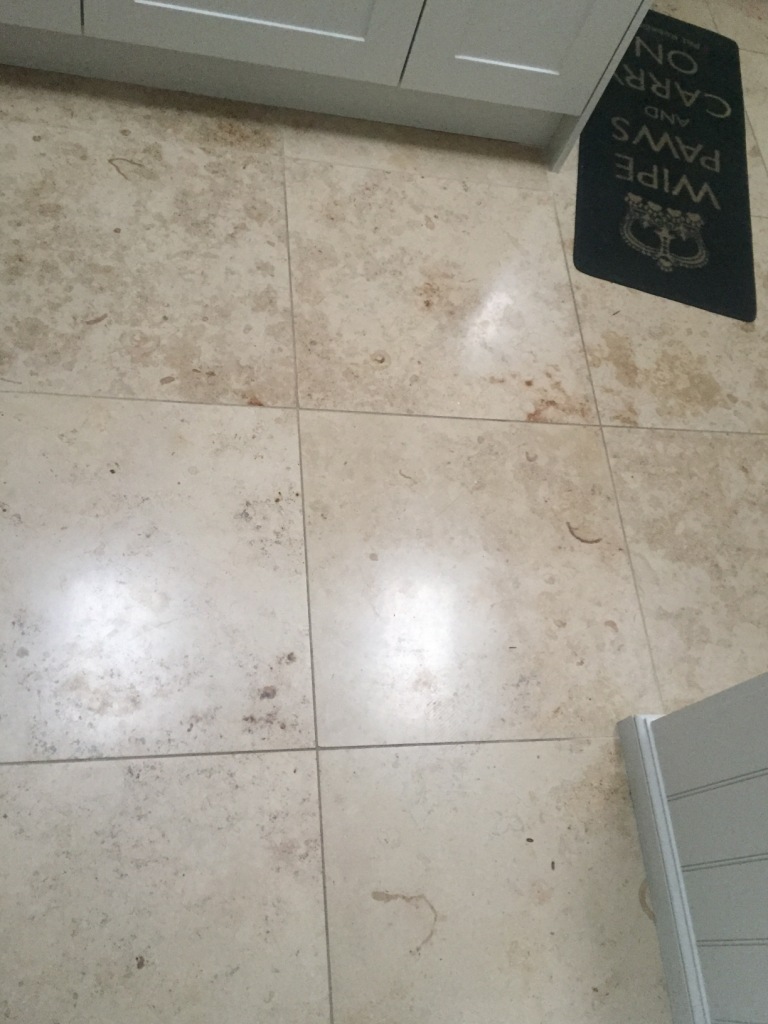
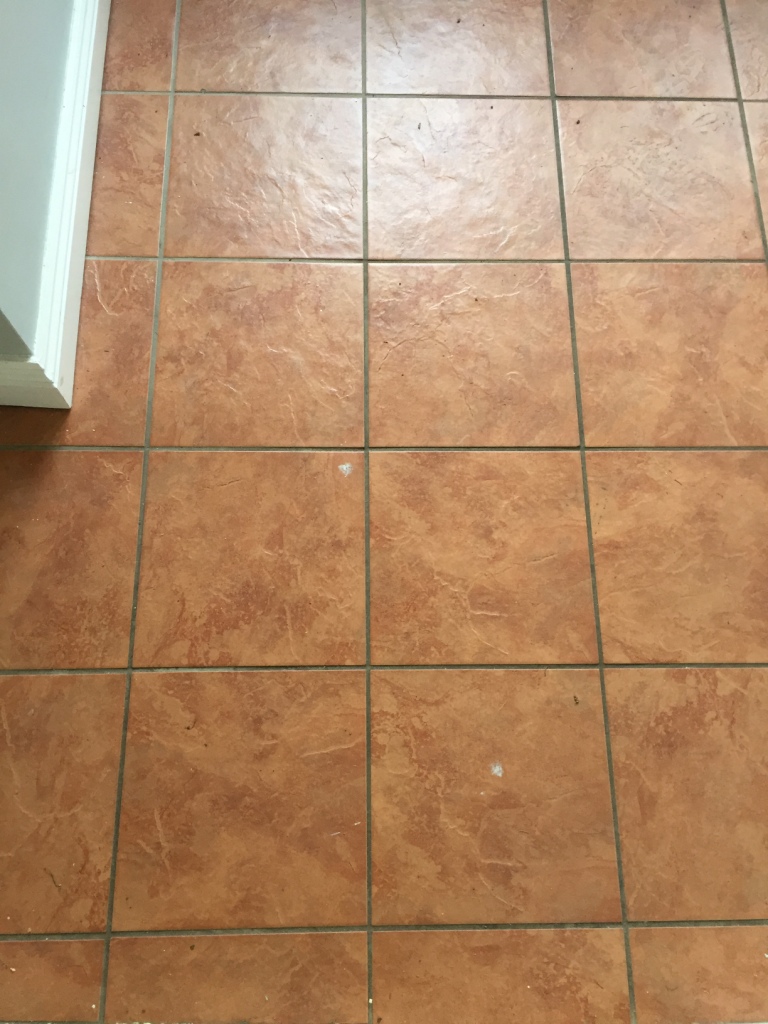
This ground floor of this house in the historic walled city of York had around 60 metres of Jerusalem Limestone installed throughout the kitchen area and some adjacent steps. Its appearance had degraded with use and was now looking flat, dirty and generally uninviting. Additionally, the customer didn’t like the natural pitting in the stone which proved to be a trap where dirt became ingrained making it more difficult to clean.

Jerusalem Limestone Before Cleaning York
I surveyed the floor and discussed the process required to restore the floor including restoration work to fill the pitting. I also worked out a price which was agreed and booked a date in the diary for the work to be done.

Cleaning and Filling a Jerusalem Limestone Tiled Kitchen Floor

My first task was to fill the holes using three different colours of grout. The floor was a mixture of shades, so I chose the best match based on the different colours in the stone. This work was tedious and a little slow but worked well and I was very pleased with the result. I come from a Tiling background so am quite used to working with grout in this manner.

Jerusalem Limestone Before Filling York Jerusalem Limestone After Filling York

Next the floor was deep cleaned with the 400, 800 and 1500 grit diamond burnishing pads fitted to a weighted floor buffer and lubricated with water. The pads are applied in sequence starting with the 400-grit pad first and the soil generated is rinsed off with water in-between. This process removes grease marks, old sealers, ingrained dirt and builds the polished finish of the limestone. I also used a hand-held burnishing block on the steps to get into the intricate corners.

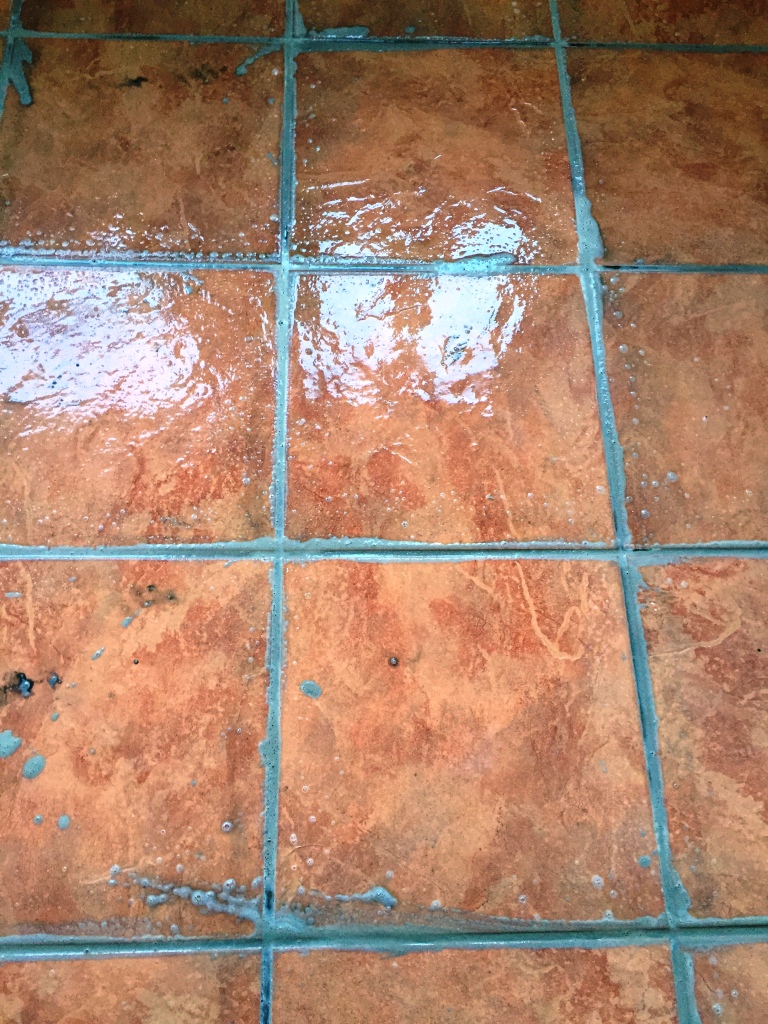
The grout was particularly dirty and was cleaned by hand using Tile Doctor Pro-Clean scrubbed in with a narrow stiff brush and the soil rinsed off with water and extracted with a wet vacuum. This product is a multi-purpose cleaner and degreaser and it really gets to work on the hard to shift build-up of dirt, grime and grease.

The floor was left to dry off overnight, the lovely warm weather was a blessing as the floor was pretty large, thankfully we didn’t need to install any driers on this occasion.

Jerusalem Limestone During Grout Cleaning York

Sealing a Limestone Tiled Kitchen Floor

I returned the next day to finish the polishing with the final 3000-grit pad applied with a little water sprayed onto the tile. once done I tested the floor with a damp meter to make sure it was nice and dry and ready for sealing. The filled areas were looking particularly good, eliminating the issue the customer was having with dirt getting stuck in them.

To seal the Jerusalem Limestone and protect it from ingrained dirt I used two coats of Tile Doctor Ultra-Seal which is a natural look sealer that doesn’t alter the appearance of the stone. As well as providing the natural no-sheen look that the customer wanted it will provide stain protection and is recommended for food preparation areas such as kitchens. It also was excellent for sealing the grout and the areas I had filled.

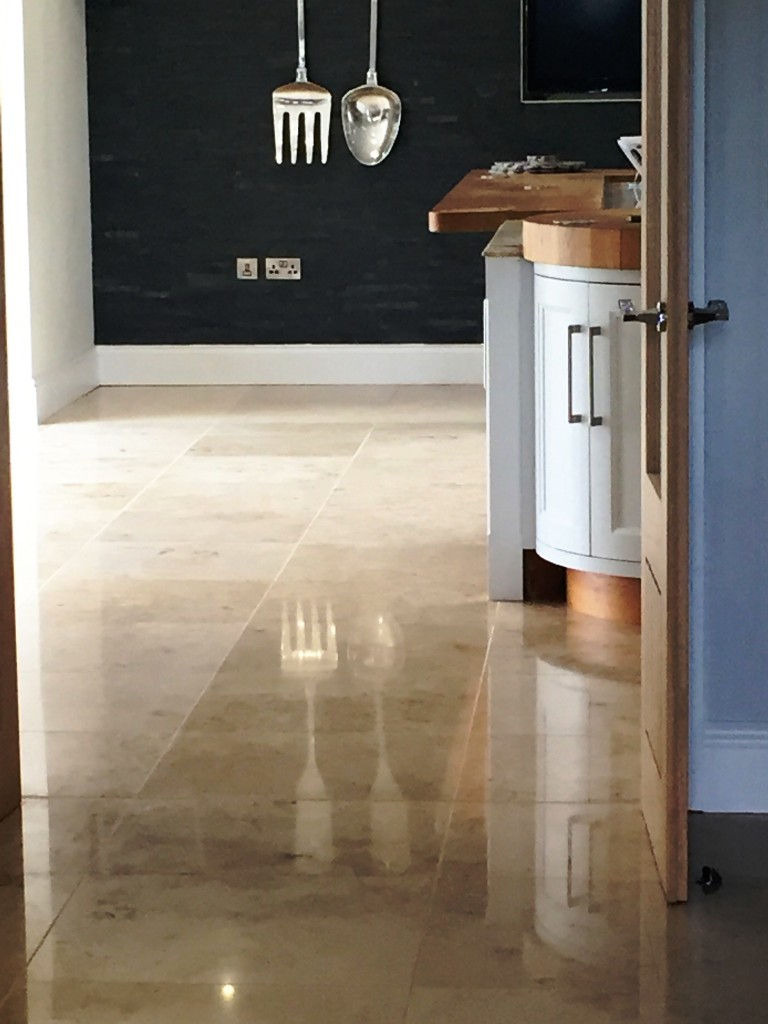
Jerusalem Limestone After Cleaning York
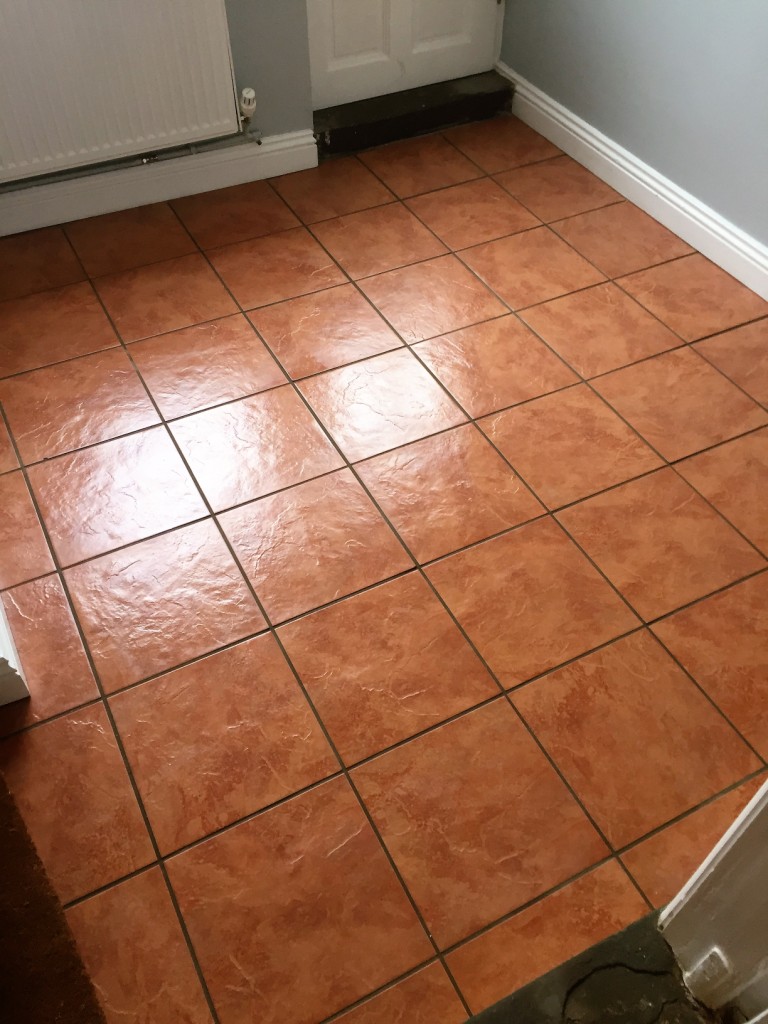
The customer was very happy with the result and couldn’t believe how fast we had worked to restore the floor. She was relieved it would now be much easier to clean and maintain.

Jerusalem Limestone After Cleaning York
 

Source: Limestone Tile Cleaning and Sealing Service in York

Renovating Jerusalem Limestone Kitchen Tiles in York Read More »

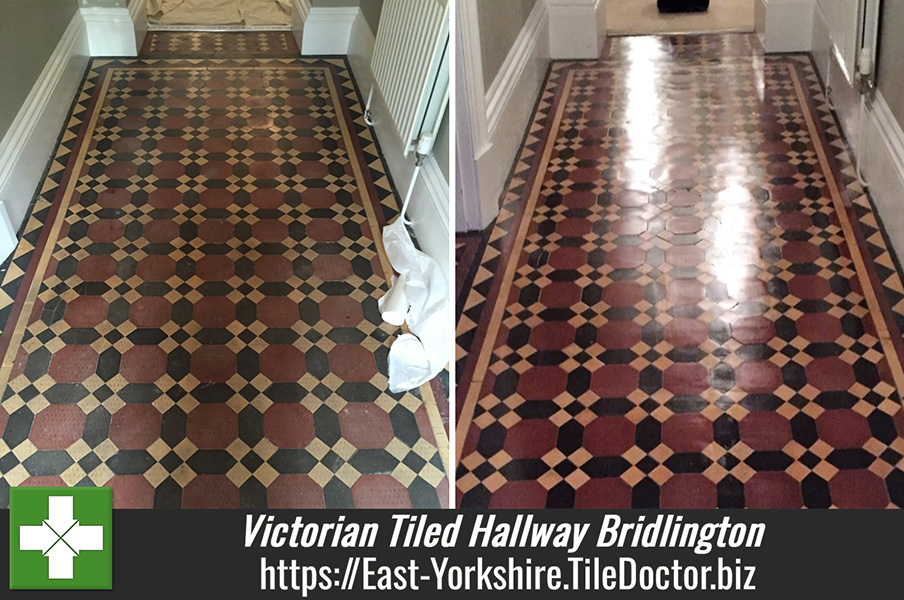
Victorian Hallway Floor Tiles Before After Restoration in Bridlington

Victorian Tiled Hallway Restoration in Bridlington

It’s fairly common for owners of older properties – especially houses those that are over 100 years old or more – to find original Victorian tiled flooring hidden underneath carpet. It can wait years for the tiles to be discovered, by which time they have amassed huge amounts of dirt and dust.

Such was the case at this property in Bridlington, a Yorkshire town through which a stream known as the ‘Gypsey Race’ runs, before emptying in the North Sea at the Bridlington Harbour. Interestingly enough, folklore says that when the stream is flowing, bad fortune is at hand. The stream must not have been running on the day that we restored this Victorian hallway, as we managed to achieve some truly fantastic results!!

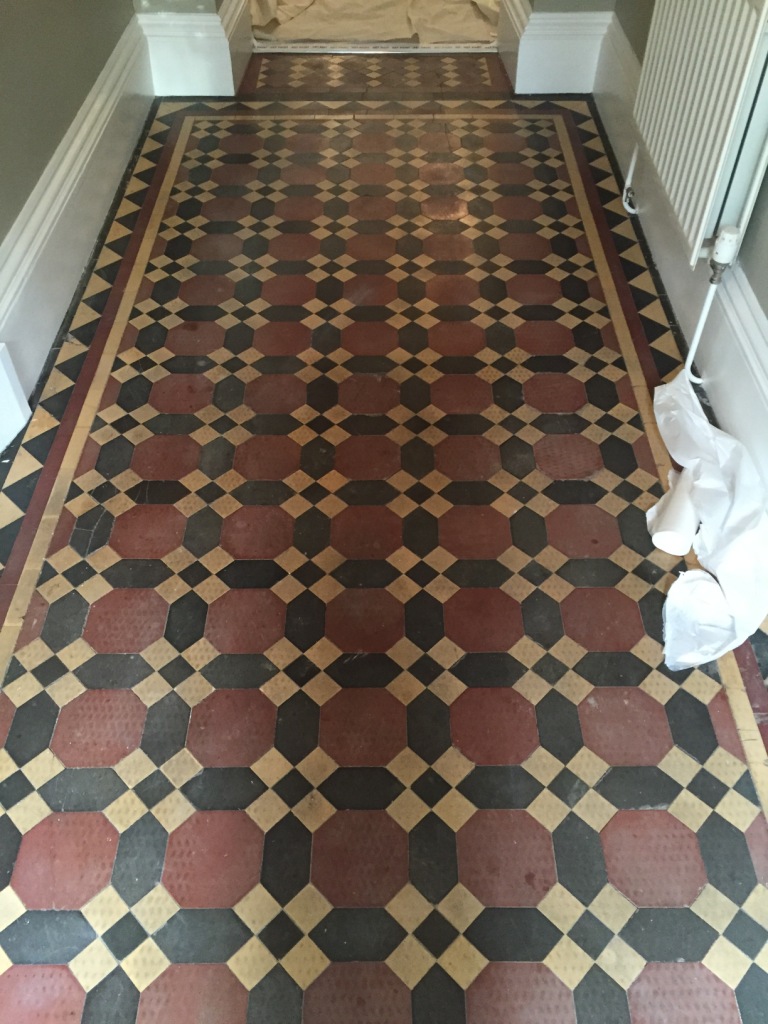
Victorian hallway floor tiles before restoration in Bridlington
The hallway had been severely dulled after going years without professional care. We set about giving it the thorough clean and fresh seal that I’d des partly needed. Here’s how we did it.

Victorian hallway floor tiles before restoration in Bridlington

Cleaning a Dirty Victorian Tiled Hallway

Our first task was to remove any old, no longer effectual sealer. We did this by liberally applying a strong dilution of our alkaline-based Tile a Doctor Pro Clean, which doubles as a reliable cleaner and a stripper capable of stripping away old sealer. The product was worked into the tiles using a black stripping pad fitted to a 17″ rotary machine, and the process was repeated three times.

Victorian hallway floor tiles during restoration in Bridlington
I noticed that there was still some stubborn dirt and old sealer around the edges of the hallway, so I used some of our handheld diamond encrusted burnishing blocks to grind it away. To finish the cleaning process, we washed the floor with Tile Doctor pH Neutral Tile Cleaner, leaving it fresh and ready to be sealed once left to dry overnight.

Sealing a Dirty Victorian Tiled Hallway

Upon our return to the property the next day, we ran some quick tests to check for any excess moisture (even a small amount could have damaged the performance of the new sealer). Once satisfied with the the condition of the floor, we proceeded to see it with an impregnating sealer, meaning a sealer that penetrates into the pores of the tile to fill them and therefore prevent trapped dirt and ingrained stains.

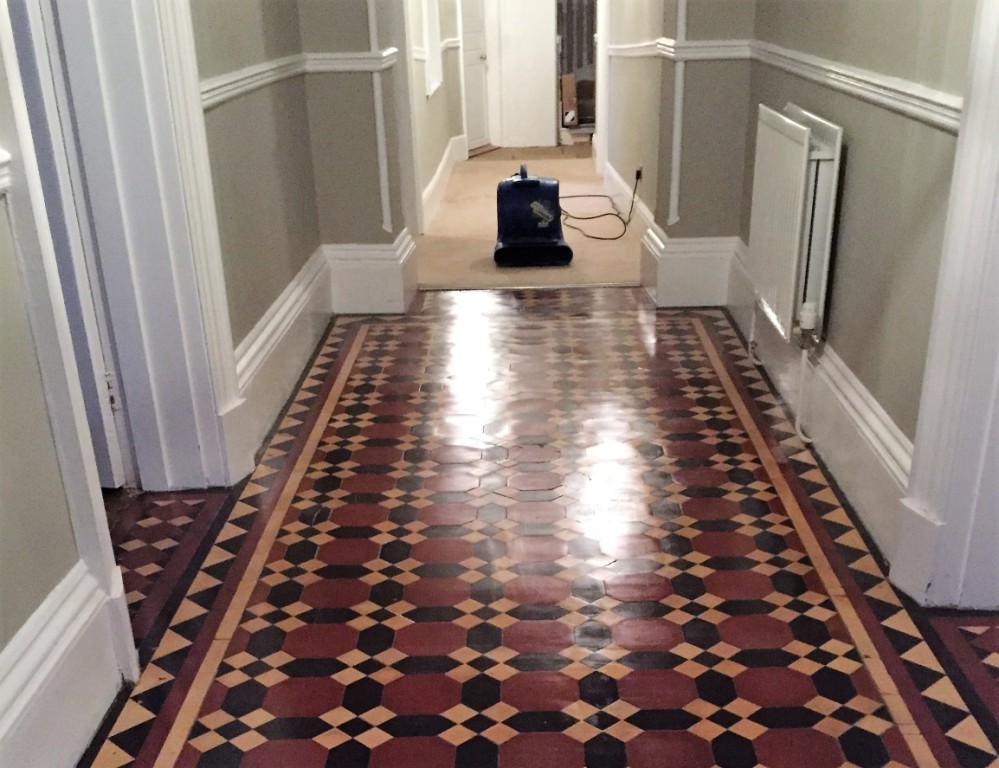
Victorian hallway floor tiles after restoration in Bridlington
Our impregnating sealer, Tile Doctor Colour Grow, has the added benefit of being colour intensifying, which really highlights the unique colourful patterns of the tiles. To give the floor a durable sheen finish, as requested by the customer, we also added a coat of Tile Doctor Seal and Go sealer.

Victorian hallway floor tiles after restoration in Bridlington
The result was a complete transformation of the condition and appearance of this great Victorian tiled hallway. Our customer is very pleased – the floor is now a complete asset to any property, and will now be easier to keep looking great in future.

Victorian Tiled Hallway Professionally Restored in East Yorkshire

Victorian Tiled Hallway Restoration in Bridlington Read More »

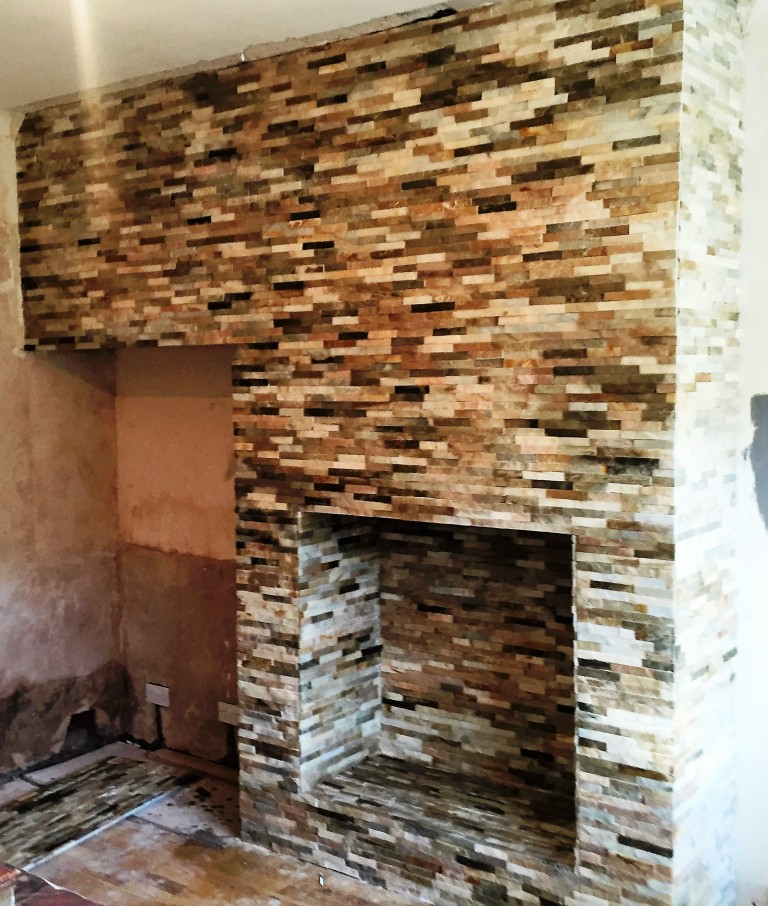
Oyster Slate Fireplace Before After Sealing Wawne

Fireplace Tiled in Oyster Slate in Wawne

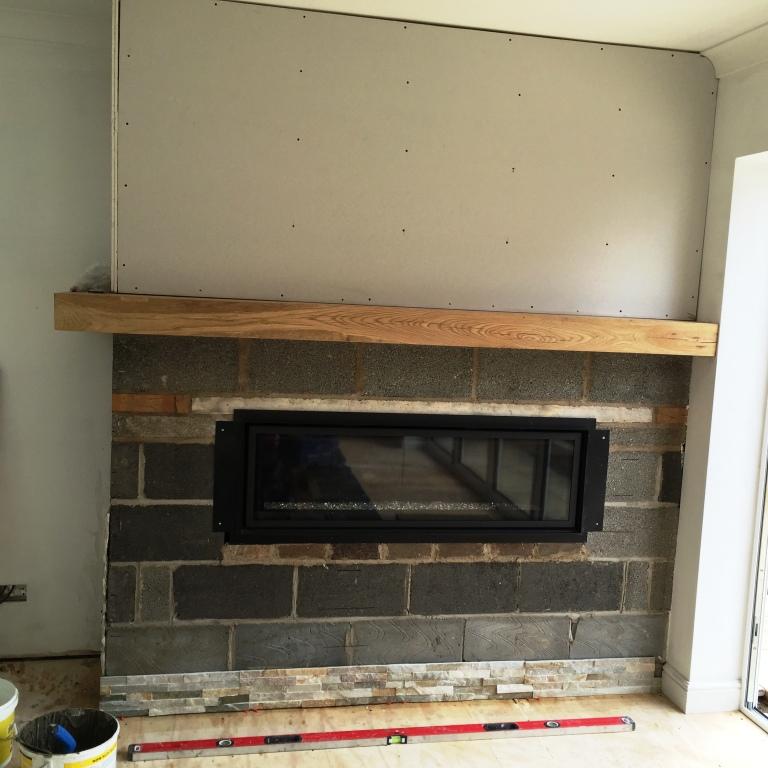
The owner of this property in Wawne Village was keen to have their electric fireplace – which was built into the wall – spruced up with some patterned tiles. While at Tile Doctor we most often focus on cleaning and sealing tiles many of the team such as myself are fully trained tilers we are also carry out full installations where requested.

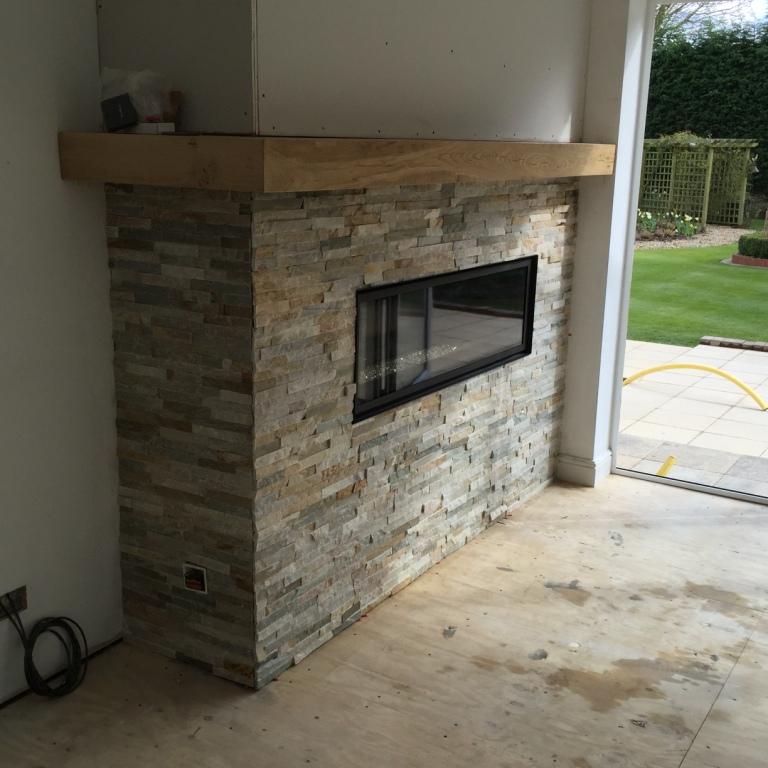
I suggested that the fireplace would look fantastic if tiled with the Oyster Slate and you may recall I did a similar fireplace in Hull which worked out really well. Oyster Slate is a natural stone that is especially well suited for giving feature walls, such as this built in fireplace, a really distinct, elegant look. My customer agreed with the suggestion, and I travelled up to the property to complete the work.

Oyster Slate Fireplace Before Installation Wawne

Cleaning and Sealing Oyster Slate Fireplace Tiles

Upon arriving at the property I spent a number of hours carefully fixing the Oyster Slate tiles and then grouting. Although the installation was new and looking very nice, it was necessary following installation to clean and seal the area, especially given the amount of loose dust particles and other general muck created in the process of cutting the tiles.

Oyster Slate Fireplace After Installation Wawne
To clean the slate and grout I used a dilution of Tile Doctor Pro Clean, our versatile alkaline cleaner. The great thing about this product is that it can be used to achieve reliable results on almost any kind of natural stone, from Victorian and Slate, to Limestone and Marble.

Oyster Slate Fireplace Before Sealing Wawne
Once clean, the area was left to dry completely. As most tiled floor owners will already know, the drying phase is very important as even the smallest quantity of excess moisture left on the tiles can cloud any sealer you choose to use. When I was satisfied that the tiles were dry and therefore ready to be sealed, I applied two coats of Tile Doctor Ultra Seal, which is our premium, natural look penetrating sealer formulated to provide maximum protection against dirt and stains.

Oyster Slate Fireplace After Sealing Wawne
Both myself and my customer were very pleased with the results. The addition of the Oyster Slate tiles have taken the fireplace from being a relatively uninteresting feature to one that really stands out and adds character to the room. With a deep clean and fresh seal, it will also be easy for the customer to keep it looking fantastic in the future.

Professional Oyster Slate Tiled Fireplace Installation in Yorkshire

Fireplace Tiled in Oyster Slate in Wawne Read More »

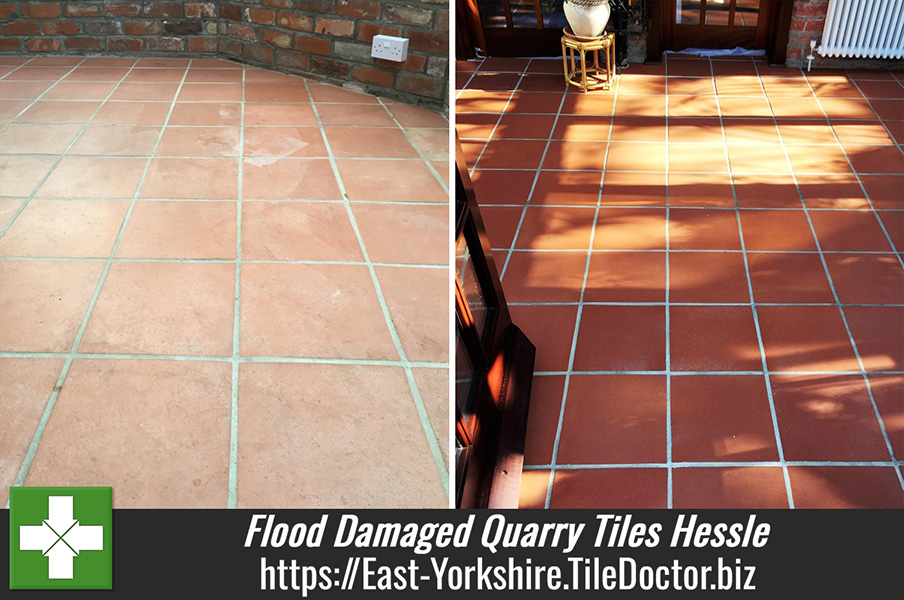
Quarry Tiled Floor Before After Cleaning in Hessle Hull

Flood Damaged Quarry Tiles Restored in Hessle

Flooding in the UK seems to have become more frequent and devastating in recent years, with areas such as Cumbria and Yorkshire being among those that have been particularly badly affected. Of course, flooding hits many homes directly, causing often irreparable damage and problems that can last for years following the incident.

Quarry Tiled Floor Before Cleaning in Hessle Hull Quarry Tiled Floor Before Cleaning in Hessle Hull

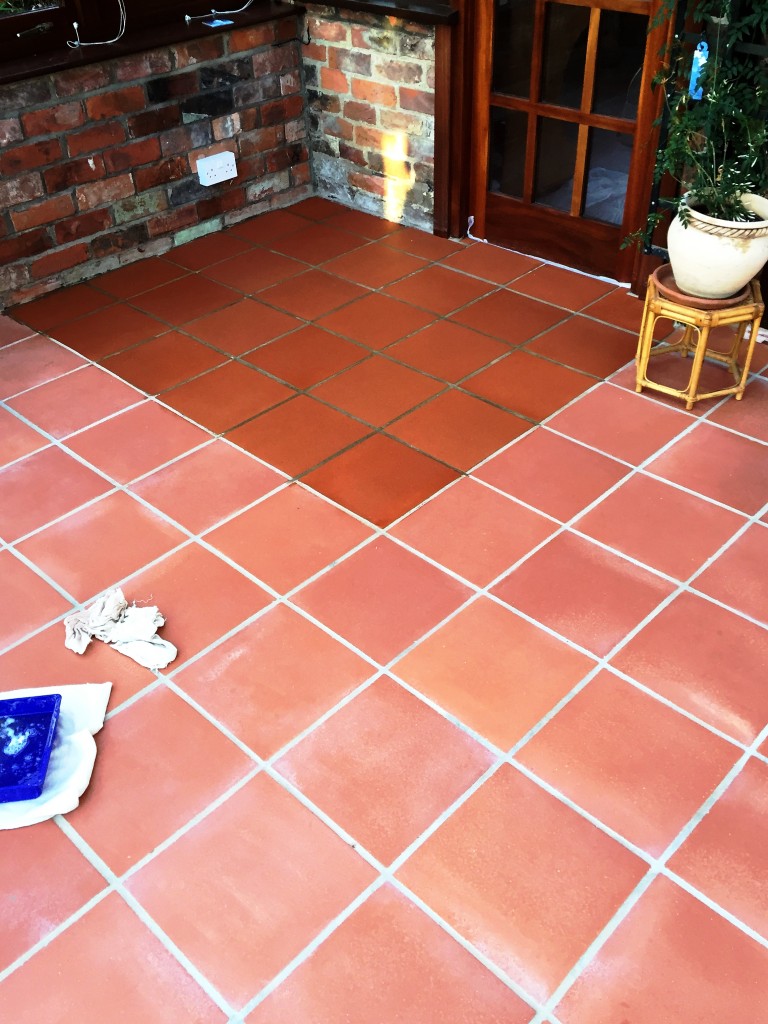
This property in Hessle had been damaged by the terrible flood that hit Hull in 2007. Nearly a decade on from the incident, the property’s Quarry tiled conservatory was still in a bad way, with what I believe to be salt deposits having built up on the surface of the floor. All in all, the floor had not fully recovered from the flooding, and was in need of a deep clean – both for the tile and the grout – and a fresh seal in order to be restored to its former glory.

The property owner called me to the property to conduct some spot tests to determine the results that could be achieved. The results were very promising so we booked in the job and got to work on the restoration.

Cleaning Flood Damaged Quarry Tiles

To begin the restoration, the floor was covered with Tile Doctor NanoTech HBU, a penetrating cleaner that utilise nano-sized cleaning particles, along with a small amount of Tile Doctor Remove and Go, a heavy duty remover used to break down old sealers, adhesives and paints. This solution was them scrubbed into the tiles using a 17” rotary machine and a black pad.

Quarry Tiled Floor During Cleaning in Hessle Hull
It was left to dwell for around 15 – 20 mins to work its way into the pores of the stone, before being scrubbed again. Given that the floor had not been treated to a proper clean in a long time, I repeated the process three times until happy that the tiles were in the best possible condition.

Quarry Tiled Floor During Cleaning in Hessle Hull

Dealing with Efflorescence

The second main part of the cleaning process involved rinsing the floor using Tile Doctor Grout Clean Up, which is an acid based product used to remove mineral deposits such as salt (also known as efflorescence) and grout smears. The floor was then given a thorough rinse to remove any trace of products and neutralise the floor before sealing, the floor was then dried as much as possible using a wet vacuum.

Sealing Quarry Tiles

Following this very through clean, the floor was ready for sealing. However, I did have to leave the floor for a few days to dry fully, as any excess moisture can upset the sealer.

Upon my return I checked for dampness before proceeding to see the tiles using two coats of Tile Doctor Colour Grow, which is a penetrating, colour enhancing sealer. The sealer penetrates into the pores of the stone to fill them and protect it against ingrained dirt.

Quarry Tiled Floor After Cleaning in Hessle Hull Quarry Tiled Floor After Cleaning in Hessle Hull

The results were truly fantastic. The combination of a deep clean and colour enhancing sealer left the floor looking brilliant. You wouldn’t have been able to tell that the floor had once suffered from severe flooding. Needless to say the customer was very satisfied.

Professional Restoration of a Flood Damaged Quarry Tiled Floors in Yorkshire

Flood Damaged Quarry Tiles Restored in Hessle Read More »

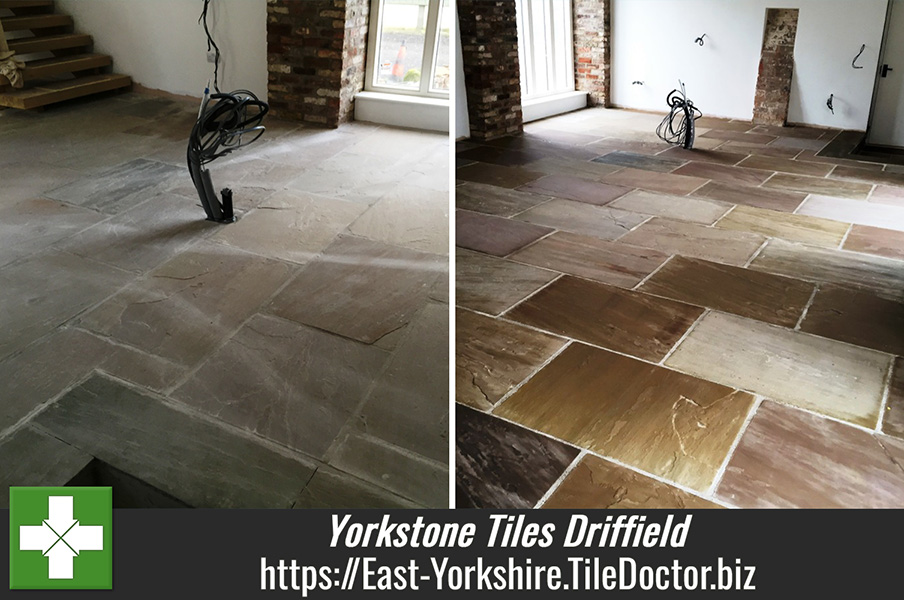
Yorkshire Stone Floor Before After Cleaning and Sealing Driffield

Recently Installed Yorkstone Tiles Cleaned and Sealed in Driffield

Yorkstone is a variety of Sandstone unique to Yorkshire, and is known for its hard wearing and durable qualities. It was first manufactured during medieval times, but is still used for a range of building and construction purposes including, of course, tiled floors in houses. Yorkstone comes in a variety of natural colours, depending on the mineral makeup of the stone, and means that the tiled floors often have a unique look to them.

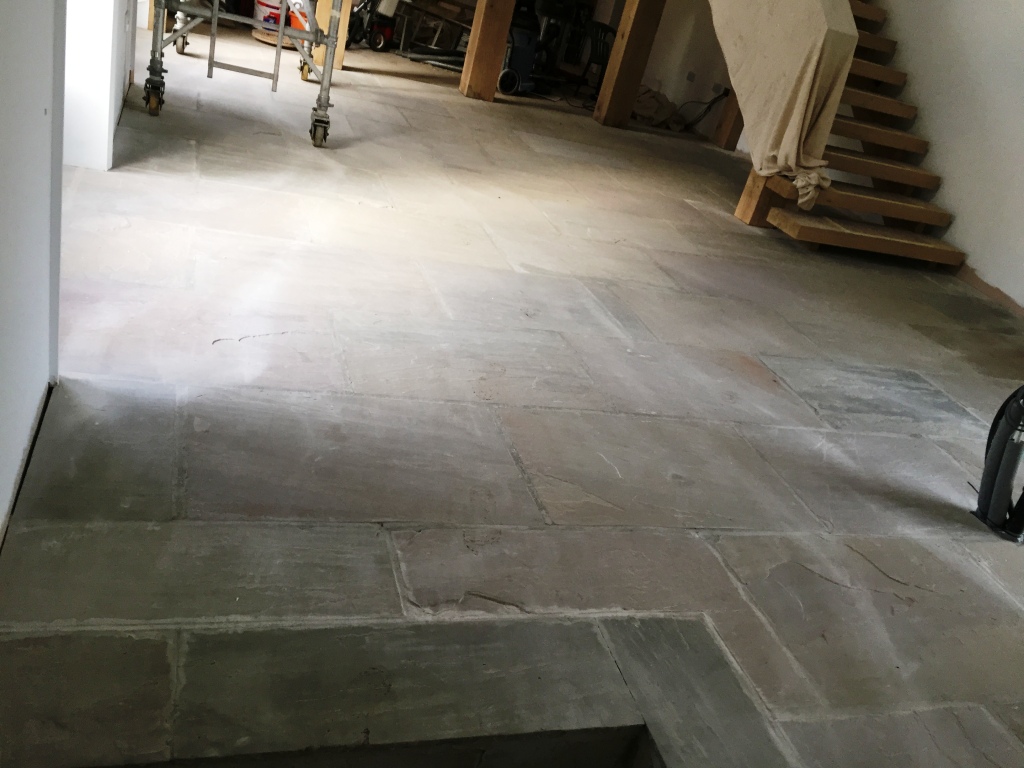
Yorkshire Stone Floor Before Cleaning and Sealing Driffield
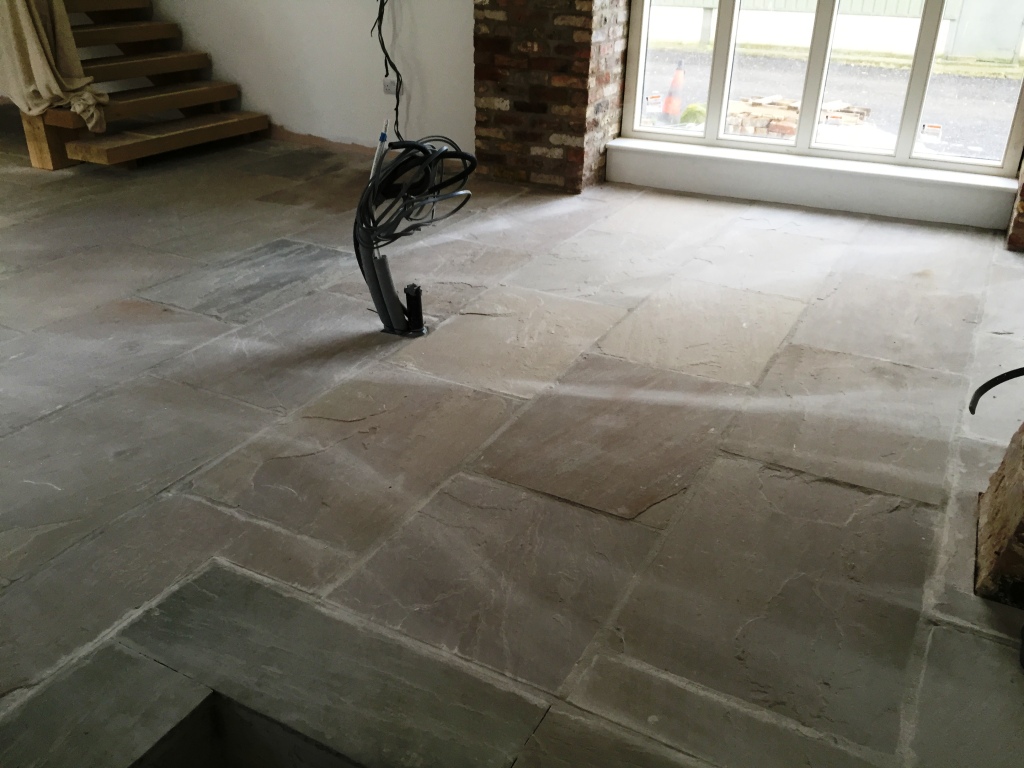
This customer, living in the small Yorkshire town of Driffield is the lucky owner of a fantastic new Yorkstone tiled living room floor. Unfortunately, the floor had been installed by an independent builder, as opposed to a professional tiling company, and had been left with no sealer to ensure it would stay looking great for a long time to come. Over time, the lack of a sealer has allowed the dirt to become ingrained in the stone, making it increasingly difficult for the customer to keep the tiles clean. I was called in to bring completion to what was an unfinished job!

Yorkshire Stone Floor Before Cleaning and Sealing Driffield

Cleaning a Yorkstone Tiled Living Room Floor

As you can see from the photographs, the entire floor was quite dusty and dull looking following the recent installation. To get the tiles clean, I mixed a strong 60-40 mix of Tile Doctor Pro Clean and clean water. Pro Clean is a reliable alkaline cleaner suitable for use on most natural stone floors, including Sandstone, Quarry, and Slate.

The cleaning solution was applied to the floor and left to dwell for 20 minutes, allowing it time to penetrate the stone. Then, using my 17” rotary machine fitted with a black scrubbing pad, I proceeded to deep clean the tiles, leaving them looking immediately cleaner and more vibrant. Any resulting cleaning residue was promptly soaked up using a wet vacuum.

Yorkshire Stone Floor After Deep Cleaning Driffield
The process was repeated in the more stubborn areas, and I gave the floor a final rinse with water and left it to dry. Typically, we would leave a 12 to 24 hour drying period, depending on whether there is a damp proof membrane installed. However, this floor had underfloor heating and so dried really quickly, allowing me to seal it on the same day.

Sealing a Yorkstone Tiled Living Room Floor

The customer wished to have a matt, natural finish for the Yorkstone tiled living room, so I applied two coats of Tile Doctor Colour Grow, our impregnating sealer which offers a natural, no-sheen look for textured floors, while providing durable protection against ingrained dirt and stains.

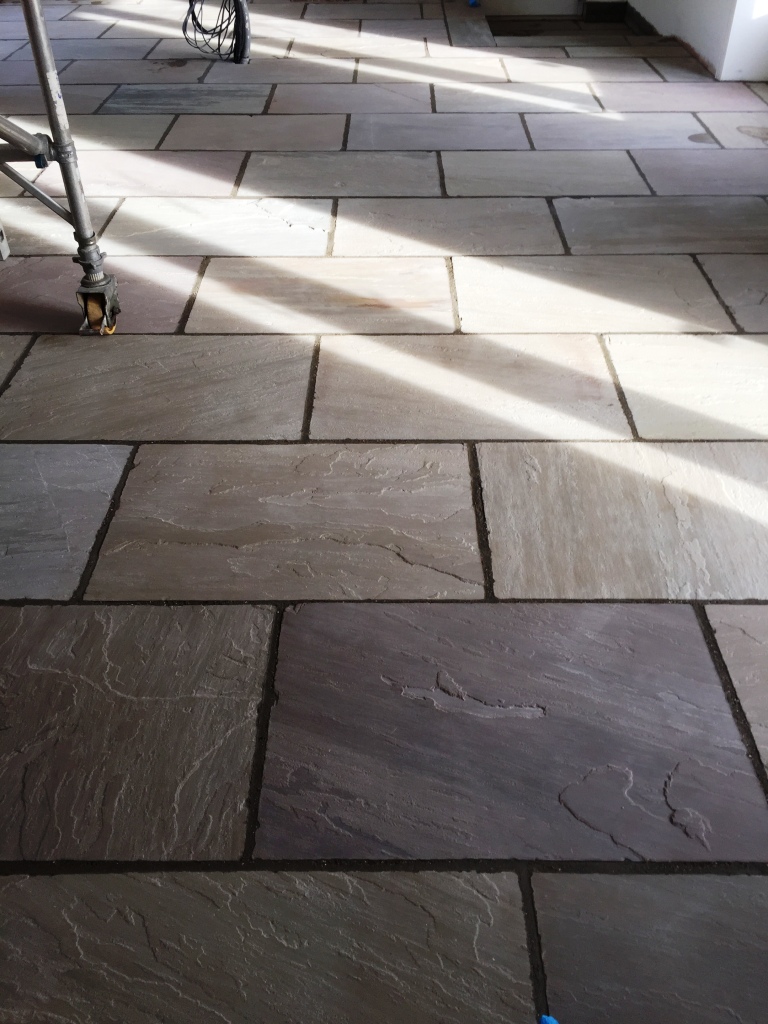
Yorkshire Stone Floor After Cleaning and Sealing Driffield
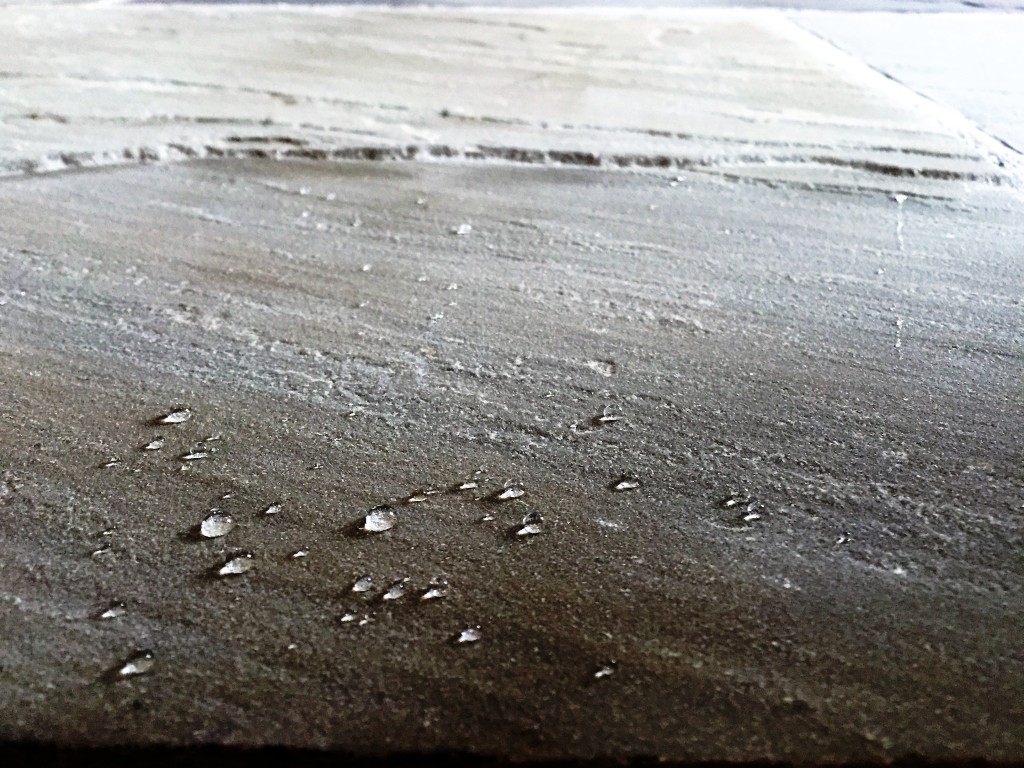
As the name of the product suggests, Colour Grow contains colour intensifying properties which really helped to accentuate the rich variety of colours in the customer’s Yorkstone tiles. The results were fantastic and you can see from the water test we performed after the sealer dried how water now bubbles up on the surface of the stone.

Yorkshire Stone Floor Cleaned and Sealed Water Test Driffield
 

Unsealed Yorkstone Cleaned and Sealed in Yorkshire

Recently Installed Yorkstone Tiles Cleaned and Sealed in Driffield Read More »

Porcelain Tiled Utility Floor Before After Cleaning and Grout Sealing in Hull

Dirty Porcelain Tiled Utility Room Cleaned and Sealed in Hull

This Porcelain tiled utility room at a property in Hull had been primarily used as an area for the household dogs, and so had suffered over the years from plenty of wear and tear.

Originating in China, Porcelain is a type of ceramic that is known to be quite hard-wearing and durable, however, dogs are known to bring all manner of muck into the house from outside, and it was certainly beginning to show here. The property owner was keen to have the tiles professionally cleaned and sealed, with the grout lines being in a particularly dire state.

Porcelain Tiled Utility Floor Before Cleaning in Hull

Cleaning a Dirty Porcelain Tiled Utility Room

To begin the cleaning process I firstly mixed a 60-40 mix of Tile Doctor Pro Clean and water. Pro Clean is our go-to cleaner for natural stone tiles due to its consistency and versatility. I applied it to the tiles and grout lines and left it to dwell for a short while, allowing it time to loosen the layers of muck and also break down any old sealer remaining on the floor.

Next, I scrubbed the solution into the floor with a 17″ rotary machine, and paid special attention to cleaning the grout lines with a wire brush, bringing them back to their original colour. Any resulting cleaning residue was removed with a wet vacuum and any chemicals remaining on the floor were washed away using a thorough rinse with water.

Sealing a Porcelain Tiled Utility Room

Before the floor could be sealed, it needed to be left to dry overnight. It is always recommended to leave freshly cleaned floors to dry for at least 24 hours before sealing, since even the slightest amount of moisture can cloud the sealer and damage its performance. Running damp tests is a good idea to make certain that the floor is completely dry.

Porcelain Tiled Utility Floor During Grout Sealing in Hull
Once satisfied that the tiles and grout lines had been fully dried out, I proceeded to seal the floor with Tile Doctor Ultra Seal. Ultra Seal is an robust impregnating sealer that prevents dirt from becoming ingrained in the grout and the stone itself, thus making the floor much easier to keep clean in the future.

The sealer also gave the floor with a bright, natural look finish, leaving it worlds apart from the condition it was in just a day previously. Needless to say the customer was very happy and impressed with the results achieved in a short space of time.

Porcelain Tiled Utility Floor After Cleaning and Grout Sealing in Hull
 

Professional Tile and Grout Cleaning and Sealing for a Dirty Porcelain Tiled Utility Room in Hull

Dirty Porcelain Tiled Utility Room Cleaned and Sealed in Hull Read More »

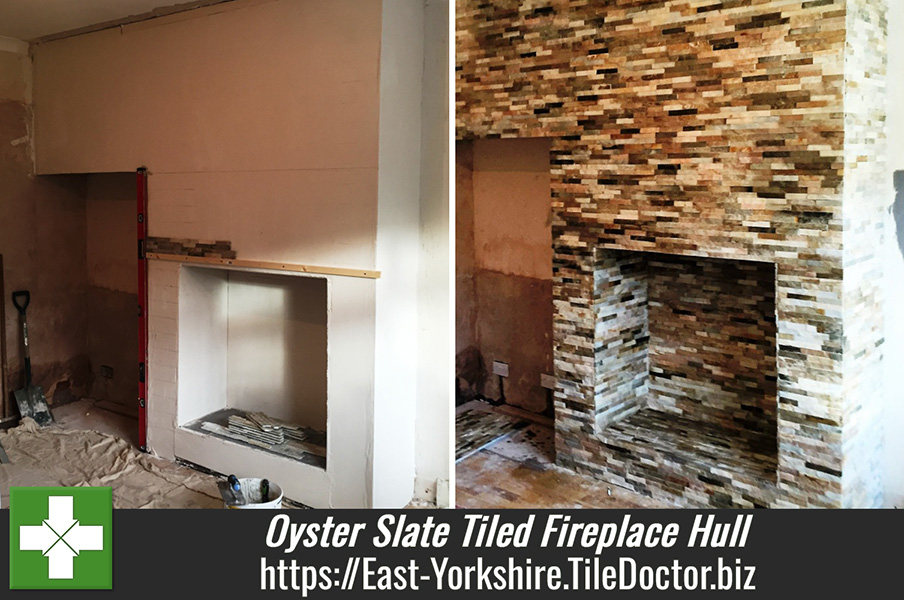
Oyster Slate Fireplace Before After Sealing Hull

Oyster Slate Tiled Fireplace Installed, Cleaned, and Sealed in Hull

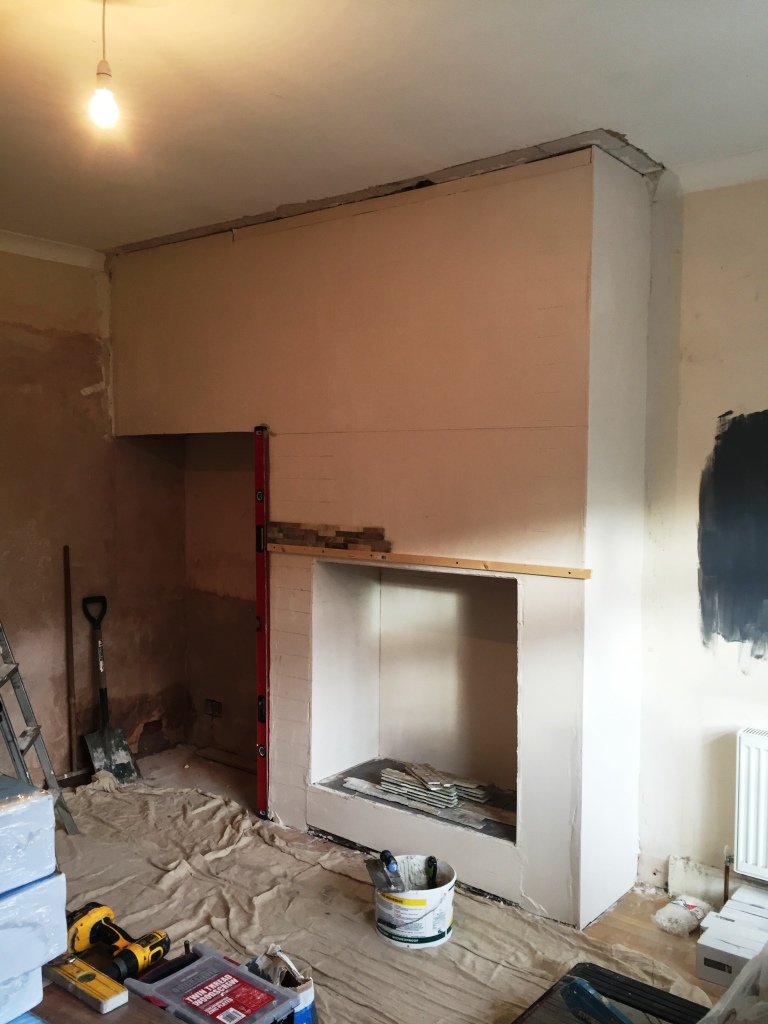
While at Tile Doctor we are more often than not asked to carry out professional maintenance for existing tiling installation we have also been known to do the installation as well. This was the case with this customer, living at a property in Hull, who contacted me about a full tile installation on their fireplace, situated in a living room which itself was undergoing some redecoration. I recommended an Oyster Slate tile, a natural stone which contains a nice range of black, brown and white shades to give walled areas a really distinct look.

Oyster Slate Fireplace Before Installation Hull
I explained to my customer – who was very happy with the choice of tile – that the fireplace would have be cleaned and sealed once the Slate tiles had been installed. This customer planned on having a coal fire installed following the tiling, but without a robust seal the Slate would be blackened by the coal and become difficult to clean.

Oyster Slate Fireplace After Installation Right Hull

Cleaning and Sealing an Oyster Slate Tiled Fireplace

Once I had successfully tiled the fireplace with the new Oyster Slate, I set about cleaning the area with an application of Tile Doctor’s versatile alkaline-based cleaner, Pro Clean. The tiles were caked with debris and dust from the tile installation, but Pro Clean – which is suitable for use on most types of natural stone tile – quickly cut through the layers of dirt and left the area looking perfectly clean and ready to be sealed.

My choice of sealer was Tile Doctor Ultra Seal, an impregnating sealer which soaks into and fills the pores of the Slate, thus preventing dirt – such as debris from a coal fire – from becoming ingrained in the stone. Ingrained dirt can make tiles notoriously difficult to clean, so it’s always recommended that you have use a suitable sealer – and keep it topped up – to make your life easier when maintaining the appearance of your tiles in future.

Oyster Slate Fireplace After Sealing Hull
The sealer also enhanced the natural colours in the slate enhancing the look of the fireplace and the customer was very pleased with her new tiled fireplace with a robust seal in place she will not have to worry about its appearance becoming spoiled any time soon.

Fireplace Tiled with Oyster Slate, Cleaned and then Sealed in Yorkshire

Oyster Slate Tiled Fireplace Installed, Cleaned, and Sealed in Hull Read More »

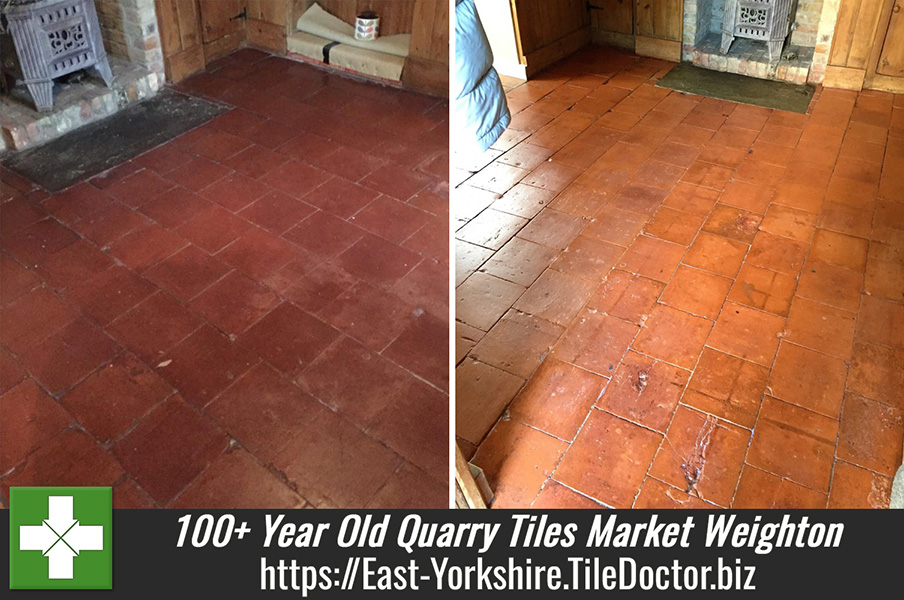
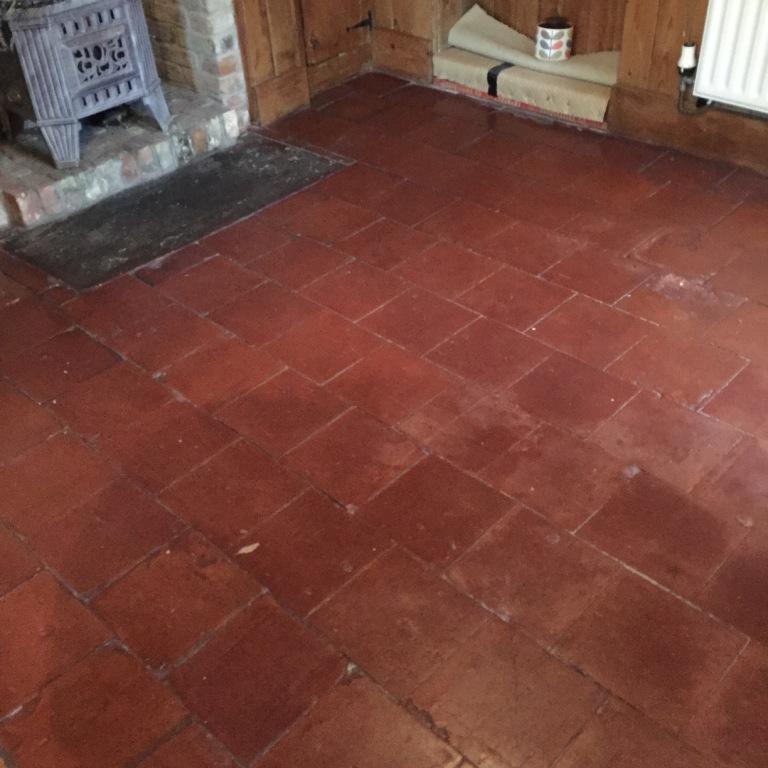
Old Quarry Tiled Floor Before After Cleaning and Sealing in Market Weighton

100+ Year Old Quarry Tiles Revitalised in Market Weighton

When you have a Quarry tiled floor like this one that is well over a century old, it’s inevitably going to have developed a number of problems over the years and be in need of some TLC. The floor, located at a property in the East Yorkshire town of Market Weighton, had been laid on a bed of sand and had no damp proof membrane which isn’t surprising for a floor of this age as a DPM didn’t really become standard until the 1960’s.

The customer was primarily interested in getting the tiles as clean as possible however I knew from past experience that floors in these circumstances can be particularly difficult to restore. Adding to this was the fact that the floor itself wasn’t in great shape to begin with, with numerous cracks and missing parts across the entire area.

I ran a test clean on a small area of the floor to show the customer the potential results and, while I explained to her that this would be a very testing job, she said she would be happy with whatever improvements could be made.

Old Quarry Tiled Floor Before Cleaning in Market Weighton

Cleaning a Very Old Quarry Tiled Floor

To clean this floor, I needed to use a strong cleaning solution consisting of half Tile Doctor Remove and Go and half Tile Doctor NanoTech HBU. Remove and Go works to break down any existing sealer and heavy soil buildup on the surface of the floor. NanoTech HBU takes the cleaning process a step further, utilising nano-sized particles to penetrate into the stone and dissolve difficult-to-reach ingrained dirt.

Once applied for the floor the solution was left to dwell for 10-20 minutes before I scrubbed it into tiles using a scrubbing pad fitted to a rotary machine. The resulting cleaning slurry was promptly removed with a wet-vax machine. Since the old floor was in a particularly bad state I resolved to repeat the cleaning process three times, followed by further spot cleaning for particularly stubborn areas. As the tiles were very uneven in parts I found a lot of easily missable areas that needed special cleaning attention by hand.

When I was satisfied with the results of the clean I neutralised the leftover chemicals using Tile a Doctor pH Neutral Tile Cleaner. The floor was then left to dry for two weeks. Under normal circumstances the floor wouldn’t take so long to dry, but here it was understandable due to the lack of a damp proof membrane.

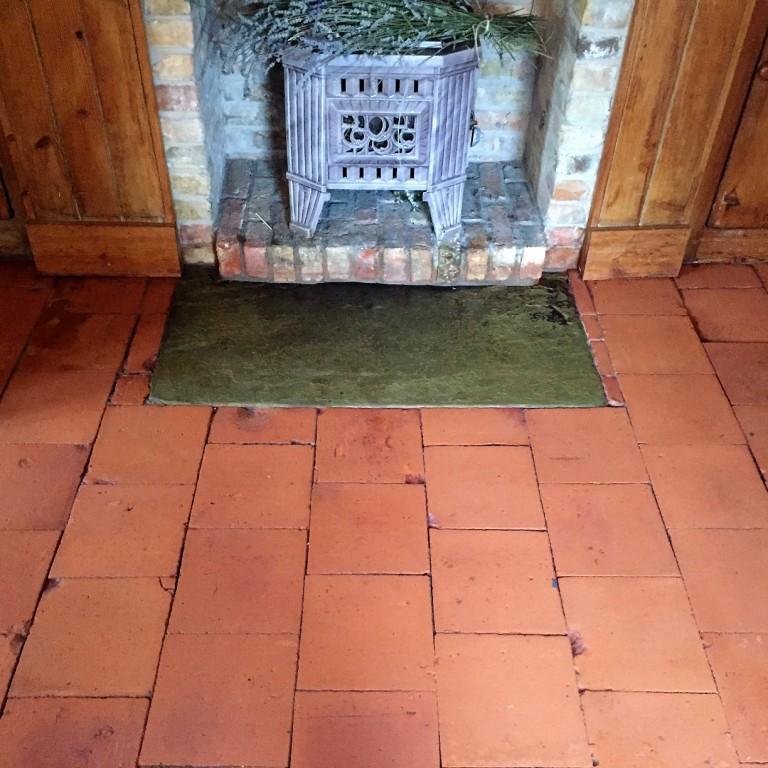
Old Quarry Tiled Floor After Cleaning in Market Weighton

Sealing a Quarry Tiled Floor

Returning to the property after two weeks to seal the floor I soon discovered efflorescence coming through the surface which are salts rising up through the tile as it dries leaving a white bloom. I quickly neutralised this using Tile Doctor Acid Gel, which is a blend of phosphoric and hydrochloric acids in gel form. The floor was then rinsed once again and left to dry before a short while.

Finally, I was ready to seal the tiles, and do so with two coats of Tile Doctor Colour Grow and one coat of Tile Doctor Seal and Go. Colour Grow is an impregnating sealer that stops dirt from becoming trapped in the pores of the stone, while also enhancing natural colour. Seal and Go is a topical sealer that forms a layer of protection on the surface, providing an aesthetically pleasing and durable sheen finish.

Old Quarry Tiled Floor After Cleaning and Sealing in Market Weighton
Considering how poor of a condition this Quarry was in when I first arrived at the property, I was very pleased with the results achieved. My customer was both very surprised and happy at the sizeable improvements to the condition of the tiles. Tiles of this age will require more frequent maintenance, and we recommend seeking professional assistance if you are the owner of a similar floor to this one.

Old Quarry Tiled Floor Restored in East Yorkshire

100+ Year Old Quarry Tiles Revitalised in Market Weighton Read More »

Marble Floor Before After Repolishing North Ferriby

Marble Floor Tiles Restored Through Burnishing in North Ferriby

These Marble tiles were installed at a lovely property in North Ferriby by another tile company who although has done a great job laying the floor had neglected to provide the owner with any kind of post-installation maintenance.

Marble Floor Before Repolishing North Ferriby
Thus the tiles, which covered a large kitchen and hallway area, appeared dull and certainly not up to the standard that could be achieved with the right methods. Funnily enough, the tile company had told the property owner that the stone would need to be sealed, but did not offer to carry out the process themselves.

Marble Floor Before Repolishing North Ferriby
After conducting their own research, the property owner contacted her local Tile Doctor to see what could be done. I came round to inspect the floor and recommended the floor was polished through a process known as burnishing, followed by the application of a sealer to provide durable protection for the stone.

Burnishing a Marble Tiled Floor

Burnishing involves the application of diamond encrusted pads with different levels of grit. At Tile Doctor we work with a four pad system that allows us to gradually refine the polish on suitable tiled floors, including Marble and Limestone.

I started the process by applying a Coarse grit burnishing pad across the entire floor lubricated with a little water, the 17 inch pads fit a rotary floor buffing machine and so are relatively straight forward to use but do take time. Following this, I worked my way through the burnishing system, repeating the process with Medium, Fine and Very Fine grit burnishing pads to achieve a brilliant, consistent shine. The floor is given a quick rinse between pads in-order to remove the resultant slurry before starting with the next pad.

Sealing a Marble Tiled Floor

The second part of the restoration was to seal the floor to protect the stone against future dirt, stains and damage, which is more common in busy areas of a house like the kitchen. I opted to seal the Marble tiles with two coats of Tile Doctor Ultra Seal.

This is a premium, no-sheen sealer that leaves the Marble with a more natural looking polished appearance. As a solvent-based, penetrating sealer it gets deep into the pores of the stone to protect against stains and ingrained dirt, especially in food preparation areas. To finish off I used the very fine diamond pad just to guarantee the brilliant shine you can see in the photos.

Marble Floor After Repolishing North Ferriby Marble Floor After Repolishing North Ferriby

The property owners were exceptionally pleased with the results achieved and will undoubtedly be glad that their lovely Marble tiled flooring is now protected for long-term use. Another satisfied client.

Marble Floor After Repolishing North Ferriby
 

Marble Tiled Floor Polished and Sealed in East Yorkshire

Marble Floor Tiles Restored Through Burnishing in North Ferriby Read More »

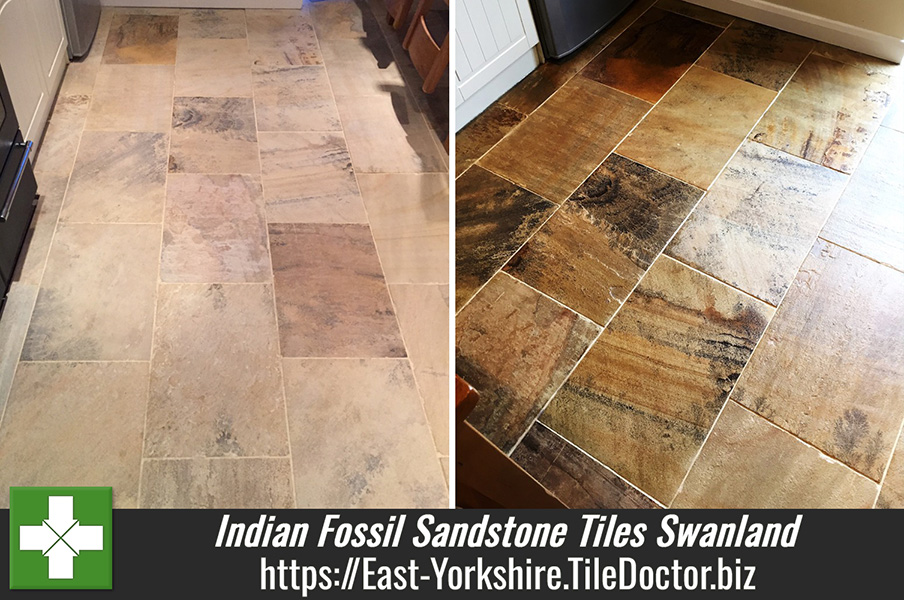
Indian Sandstone Floor Before After Cleaning Swanland

Indian Fossil Sandstone Tiles Restored in Swanland

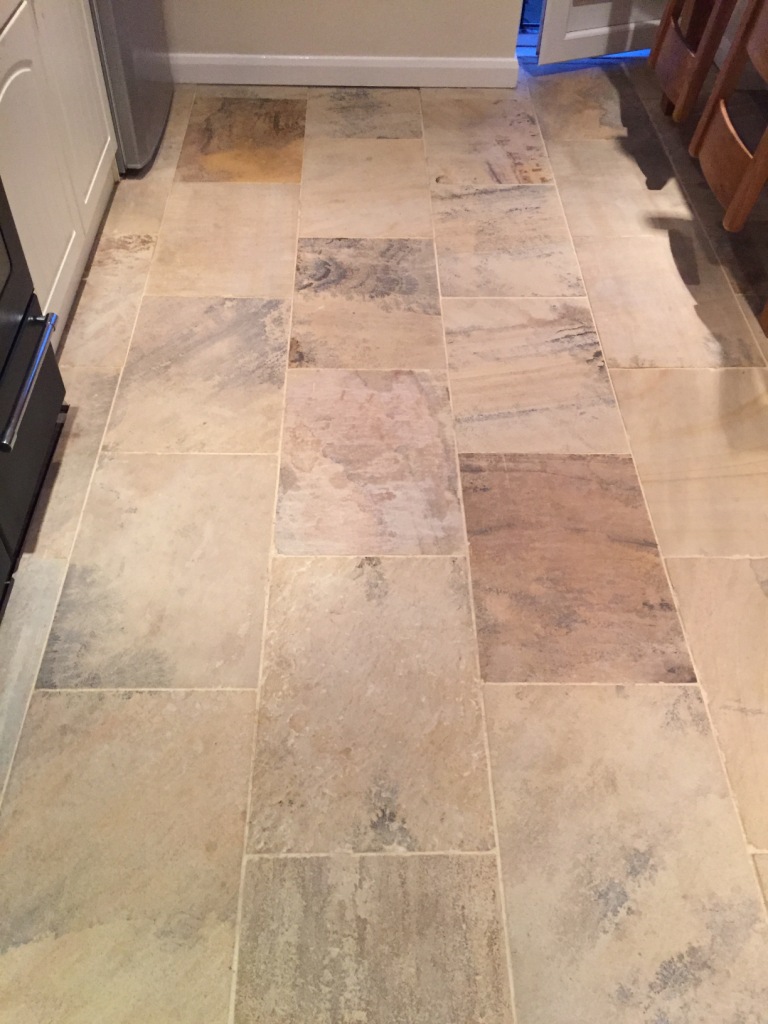
These Indian Fossil Sandstone tiles (sometimes known as ‘Yorkstone’ tiles) at a property in the small town of Swanland near Hull were, on initial inspection, in great condition, with no cracks or damaged tiles. However, thanks to a lack of sealer, the tiles had become ingrained with dirt, resulting in a heavy soil buildup that dulled the appearance of the stone. Also noticeable were some unsightly cement splashes around the grout lines.

Indian Sandstone Floor Before Cleaning Swanland
The property owner contacted me with the problem and I recommended that the tiles were simply in need of a deep clean and seal and after arranging a date I went over to carry out the job.

Cleaning an Indian Fossil Sandstone Floor

I started the job by tackling the cement splashes around the grout lines. In this case I opted to carefully break them down manually using a good old fashioned hammer and chisel, whereas when it comes to stubborn adhesive and paint stains I would recommend a specialised cleaner such as Tile Doctor Remove & Go.

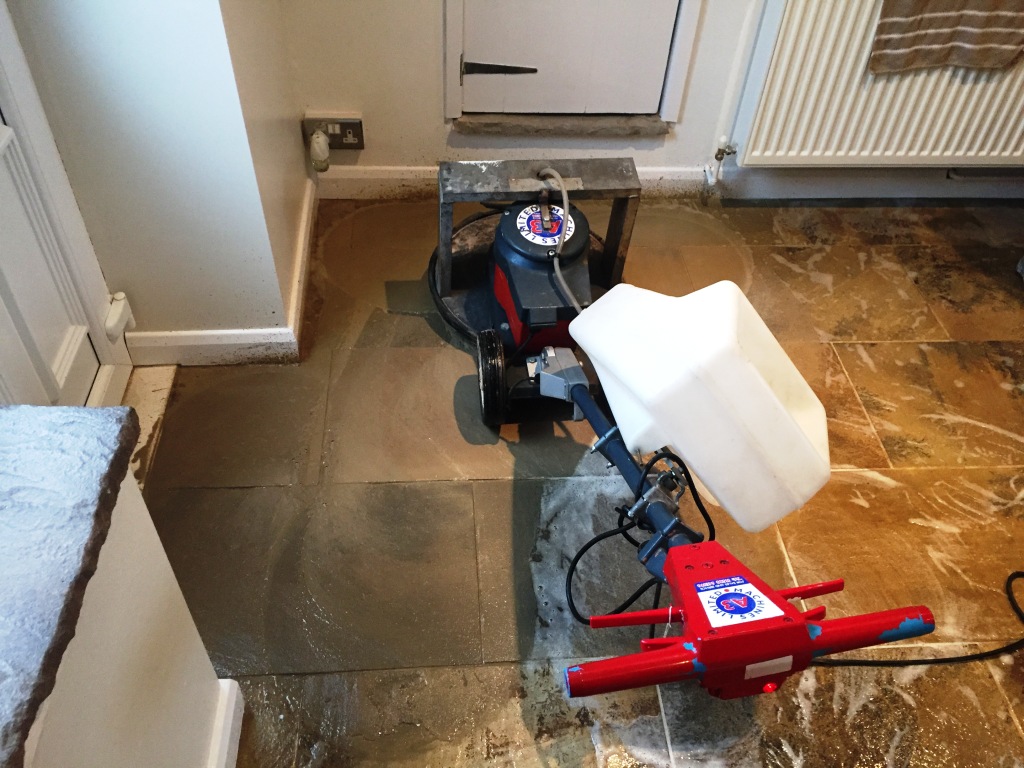
The first step of cleaning the main area of Sandstone tiles was to mix a solution of one part Tile Doctor Pro Clean to four parts water, before applying it to the stone and scrubbing it in with a black pad fitted to a rotary machine. This helped to break down the heavy soil build up, and is an effective method for doing so on most types of natural stone floor.

Indian Sandstone Floor During Cleaning Swanland
The second step involved rinsing the floor with Tile Doctor Neutral Cleaner to neutralise the floor (after exposure to the high alkaline Pro Clean) and remove the other products used to clean the surface. This also helped to shift any remaining ingrained dirt caused by a lack of sealer, leaving the tiles clean and ready to receive a new seal.

Sealing an Indian Fossil Sandstone Floor

After completing the clean, I left the property to allow the floor to dry overnight. Upon my return the next day, I checked for excess moisture and, once satisfied the floor was dry, I proceeded to seal the floor with four coats of Tile Doctor Seal & Go. Checking for excess moisture prior to sealing is essential as it can cloud the sealer and damage its performance.

Seal & Go is a water-based topical sealer designed to build up stain resistant
protection on the surface of the floor and to allow moisture vapour transmission. It
is typically used to seal internal, unsealed porous surfaces, including Sandstone,
Quarry and Victorian tiled floors and being water based you don’t get a smell as it dries.

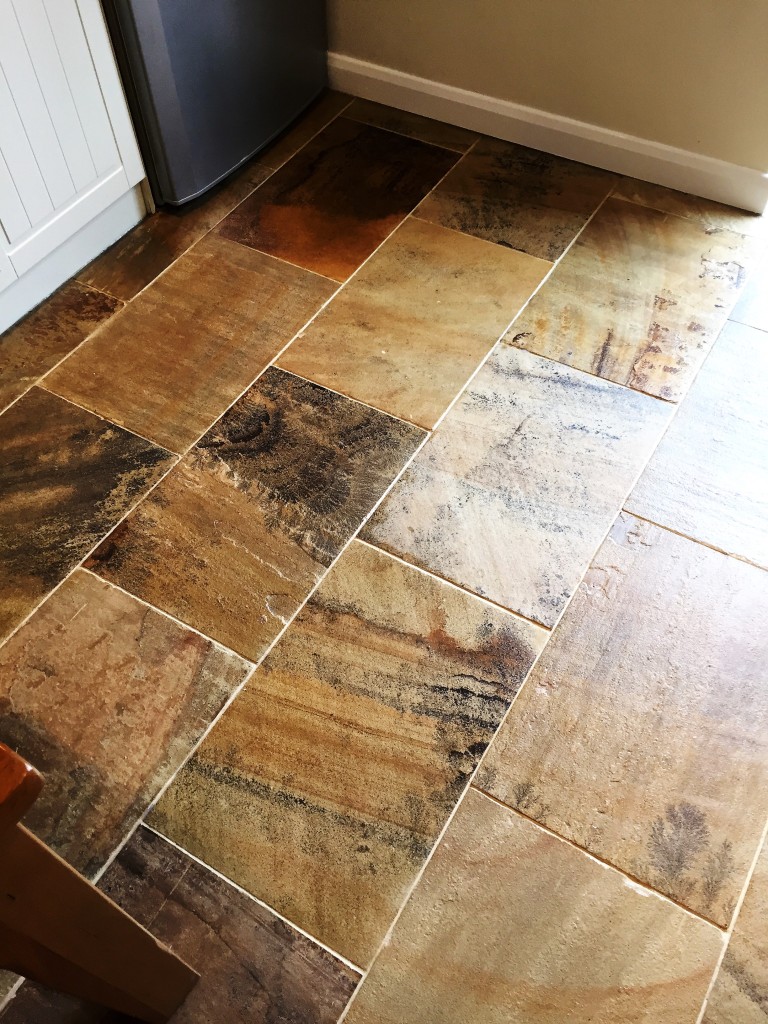
Indian Sandstone Floor After Cleaning Swanland
These once dull and dirty Sandstone tiles are now restored back to looking their best thanks to a deep clean. With the addition of a fresh seal, the tiles are protected against future soil build up and spillages, and have an aesthetically pleasing low-sheen finish.

Dirty and Dull Indian Fossil Sandstone Tiled Floor Refreshed in East Yorkshire

Indian Fossil Sandstone Tiles Restored in Swanland Read More »

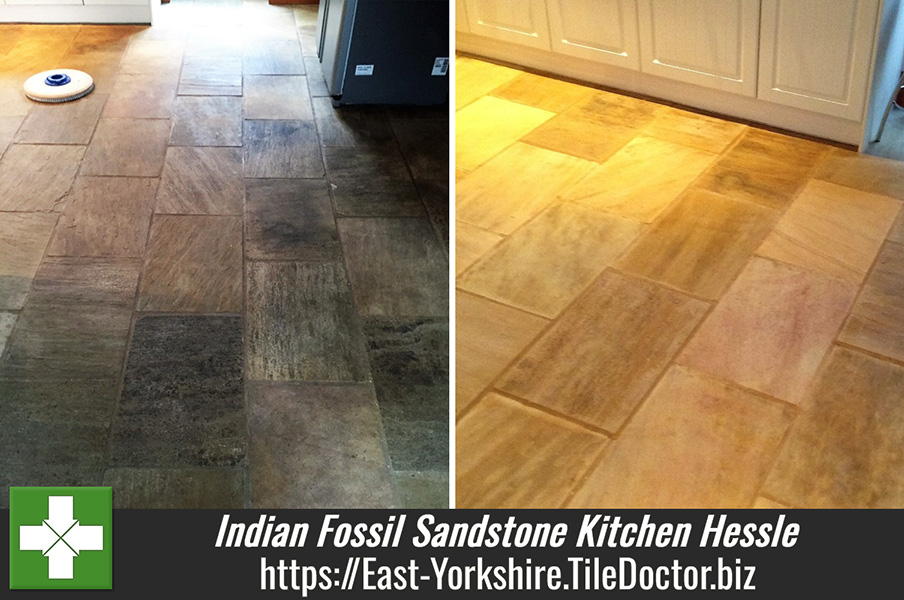
Indian Fossil Sandstone Kitchen Floor Before After Cleaning Hessle

Indian Fossil Sandstone Kitchen Floor Restored in Hessle

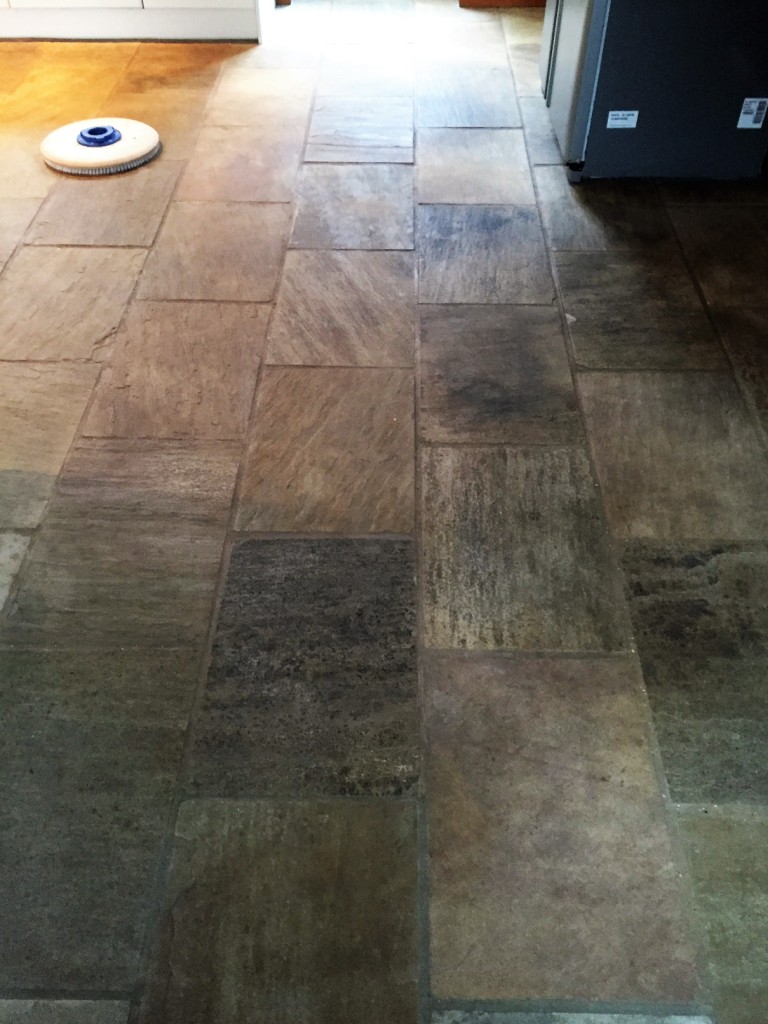
The pictures below are of an Indian Fossil Sandstone tiled floor at a house in the small town of Hessle which as you can see was in a need of a deep clean and seal. The tiles themselves where in good physical condition with no cracks, just a lack of sealer and a heavy build up of dirt.

Indian Fossil Sandstone Kitchen Floor Before Cleaning Hessle

Cleaning dirty Flagstone floor tiles

I started the job by dealing with some unsightly cement splashes that had been left around the grout lines, breaking them down manually using a good old fashioned hammer and chisel.

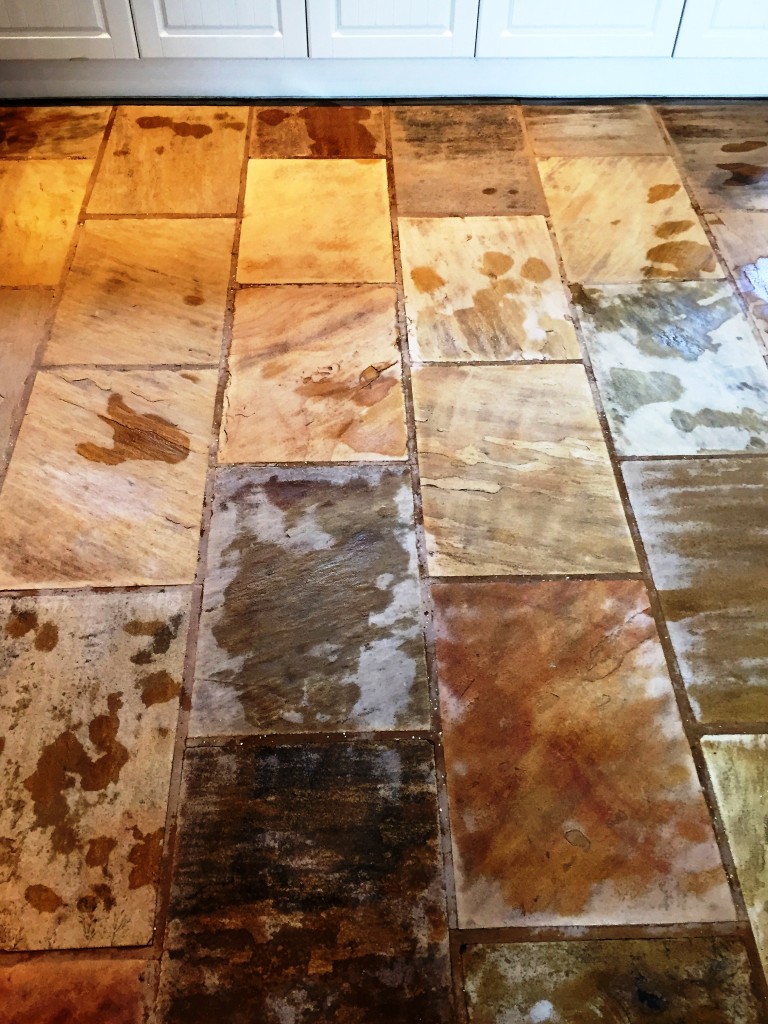
Once that was taken care of step one was to mix a solution of one part Tile Doctor Pro-Clean to four parts clean water, applying it to the tiles and scrubbing it in with a black pad fitted to a rotary machine. The second step involved rinsing the floor with Tile Doctor Neutral Cleaner to neutralise the floor and remove any trace of product used to clean the surface. This process removed the ingrained dirt caused by a lack of sealer and clean the area ready to receive a fresh seal.

Indian Fossil Sandstone Kitchen Floor During Cleaning Hessle

Sealing the Flagstone tiled floor

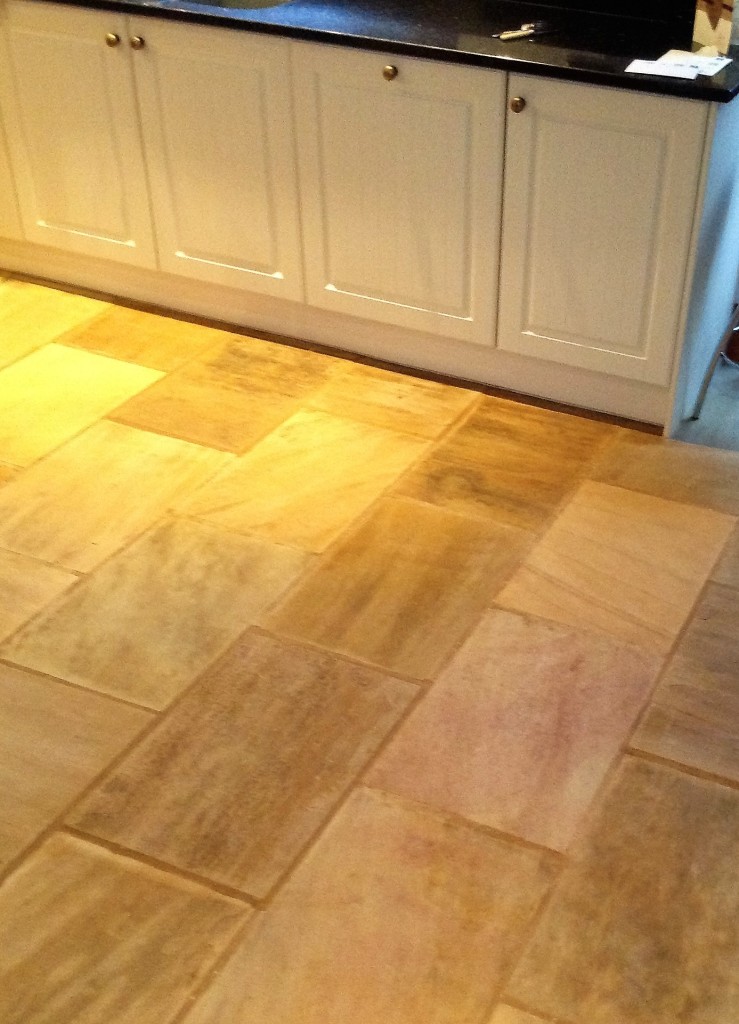
I left the property to allow the floor to dry over night. Upon my return the next day, I checked for excess moisture and, once satisfied the floor was dry, I proceeded to seal the floor with four coats of Tile Doctor Seal & Go. Seal & Go is a water-based topical sealer designed to build up stain resistant protection on the surface of the floor and to allow moisture vapour transmission. It is typically used to seal internal, unsealed porous surfaces, including Sandstone, Quarry and Victorian tiled floors.

Indian Fossil Sandstone Kitchen Floor After Cleaning Hessle
 

Sandstone Tiled Floor Restoration in East Yorkshire

Indian Fossil Sandstone Kitchen Floor Restored in Hessle Read More »

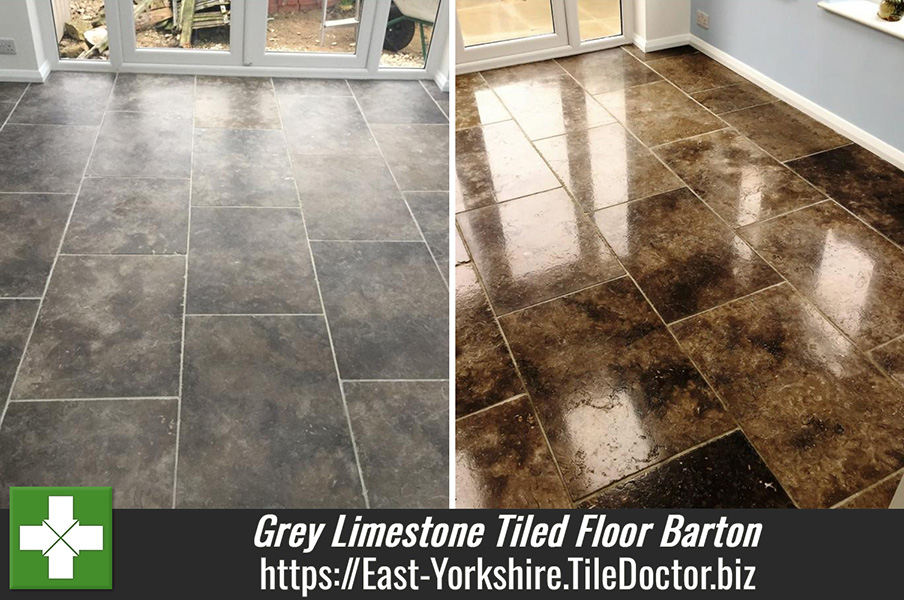
Grey Limestone Floor Before After Cleaning Barton

Grey Limestone tiled floor Polished and Sealed in Barton

This beautiful Grey Limestone tiled floor in the small village of Barton had been installed by a tile company but had not been treated in any way. The customer had been told by the tile shop that the stone in question would have to be sealed. After doing her own research and finding us at Tile Doctor I went to see what could be achieved.

Grey Limestone Floor Before Cleaning Barton

Polishing a Limestone tiled floor

As the floor was new I was able to get straight into polishing the Limestone with a set of four diamond encrusted Burnishing pads fitted to a rotary floor machine. I started with a course burnishing pad lubricated with a little water and then this was followed by the medium, fine and very fine pads to achieve the desired effect giving the floor a quick rinse in-between each pad.

Grey Limestone Floor During Cleaning Barton
As you can see from the photographs going over the full floor with each pad I managed to achieve a great polish on the floor and it was soon ready to be sealed.

Grey Limestone Floor After Cleaning Barton

Sealing a Limestone tiled floor

After polishing, the only task remaining was to provide the floor with a durable seal that would protect the Limestone from staining. I did this by applying a couple of coats of Tile Doctor Ultra Seal, which is a premium, natural-look penetrating sealer that is specially designed to provide maximum stain protection from within.

Grey Limestone Floor After Cleaning Barton
 

Polishing and Sealing Limestone Floor Tiles

Grey Limestone tiled floor Polished and Sealed in Barton Read More »

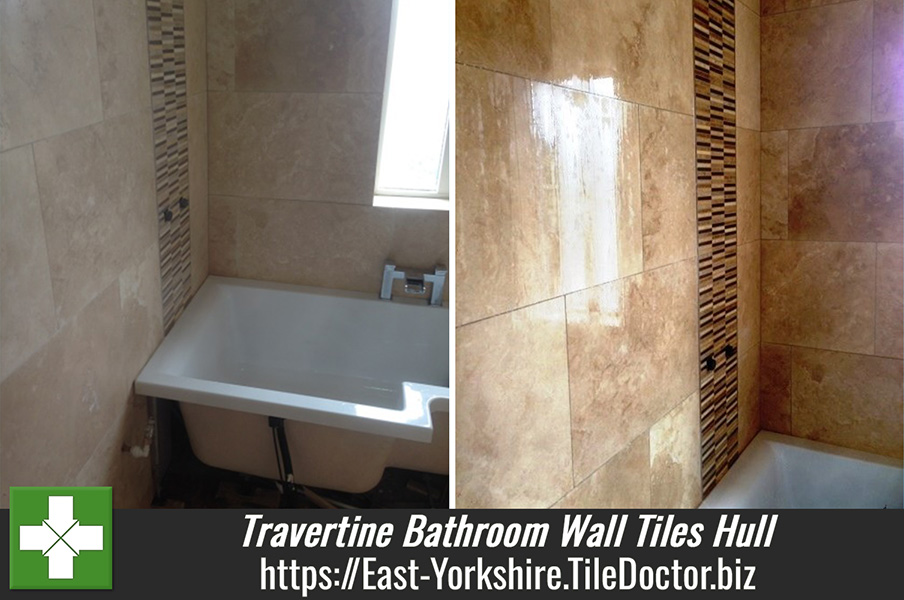
Travertine Wall Tiles Cleaned Polished and Sealed Hull

Travertine Bathroom Wall Tiles Refinished Following Installation

For this job, I was asked to work on my client’s newly installed bathroom in their house in Hull, the largest city in East Yorkshire. The new bathroom consisted of natural Travertine stone, and my task was to give the tiles a thorough clean, polish and seal. Travertine is a form of limestone with a distinct appearance consisting mainly of tan, white and cream-coloured shades. It’s commonly used for both residential and commercial use; although recently installed the tiles were dull and lifeless and not looking anywhere near their best.

Travertine Wall tiles Before Cleaning Polishing and sealing Hull Travertine Wall tiles Before Cleaning Polishing and sealing Hull

Polishing and cleaning Travertine bathroom tiles

My first task was to polish the wall tiles using the Tile Doctor burnishing system, this consists of four six-inch buffing pads with different grits. Starting with a coarse pad you grind off any dirt off the tile before moving onto the medium, fine and very fine pads which build up the polish. The result was a superior polished finish, as you can see from the below photo

Travertine Wall tiles Before Cleaning and Polishing Hull Travertine Wall tiles After Cleaning and Polishing Hull

After achieving the desired polished finish, I set about cleaning the tiles using a solution of Tile Doctor Pro-Clean, a high alkaline cleaner safe to use on stone and grout, diluted with water. Once mixed, the solution was applied using spray bottles as the air makes the solution lighter and enables it to stick to the vertical surface. The solution was then scrubbed into the tile and grout to lift out any ingrained dirt and muck left over from the initial installation of the bathroom.

Following the clean I gave the bathroom tiles a good rinse with water to remove any trace of product; I used a wet-vacuum machine to remove any excess residue and left the tiles to dry.

Sealing Travertine bathroom tiles

The last step was to seal the bathroom Travertine tiles. After checking to make sure the whole area was completely dry, I applied five coats of Tile Doctor Colour Grow. Colour Grow is a colour intensifying, impregnating sealer which accentuated the natural shades in the Travertine, while at the same time providing a durable surface seal. The product is suitable for use on both internal and external Travertine tiled floors and walls, along with a range of other natural stone surfaces.

The sealer was applied using cloths, and the Tile Doctor three cloth system. The surface was also buffed after the application of each coat of sealer.

Travertine Wall tiles Cleaned Polished and sealed Hull Travertine Wall tiles Cleaned Polished and sealed Hull

My client was very pleased with the end results; the Travertine surface finish is now looks exactly the way she had expected it to look.

Clean, polish and seal for Travertine bathroom wall tiles in Hull

Travertine Bathroom Wall Tiles Refinished Following Installation Read More »

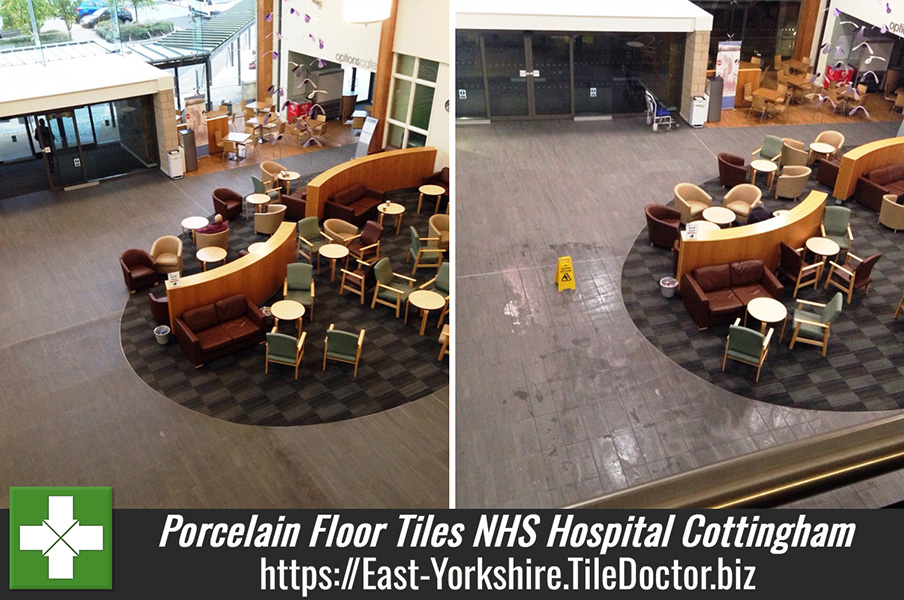
Deep Cleaning Porcelain Tiled Floor Cottingham Hospital

Deep Cleaning Porcelain Floor tiles at an NHS Hospital in Cottingham

Although we do work on a lot of residential floors we also get commercial work such as the following request to deep clean Porcelain floor tiles in the high-traffic entrance area of the NHS Cancer Ward in Cottingham, near the city of Hull.

Deep Cleaning Porcelain Tiled Floor Cottingham Hospital
The Porcelain floor itself was quite large, measuring 170 square metres, and was in need of a thorough clean. The Porcelain tiles were Italian with a cement grey grout line, in addition, they had been laid in sections using a plastic Schluter Systems expansion joint. As you can imagine, the unit has a lot of patients walking around, along with doctors, nurses and other staff. Consequently, my contact at the NHS requested that we conduct the work at night, as this is the quietest time of day and therefore both risk and disruption are minimised.

Deep Cleaning Porcelain Tiled Floor Cottingham Hospital

Cleaning the Porcelain tiled floor

I started the job off with a deep clean, using a solution of Tile Doctor Pro-Clean diluted with water, the dilution was roughly thirty per cent Pro-Clean to seventy per cent water. This strength of solution was sufficient enough to lift the ingrained dirt and stains out of the Porcelain tiles. Pro-Clean is a very versatile alkaline cleaner which can be used on most types of floor including natural stone.

Deep Cleaning Porcelain Tiled Floor Cottingham Hospital Deep Cleaning Porcelain Tiled Floor Cottingham Hospital

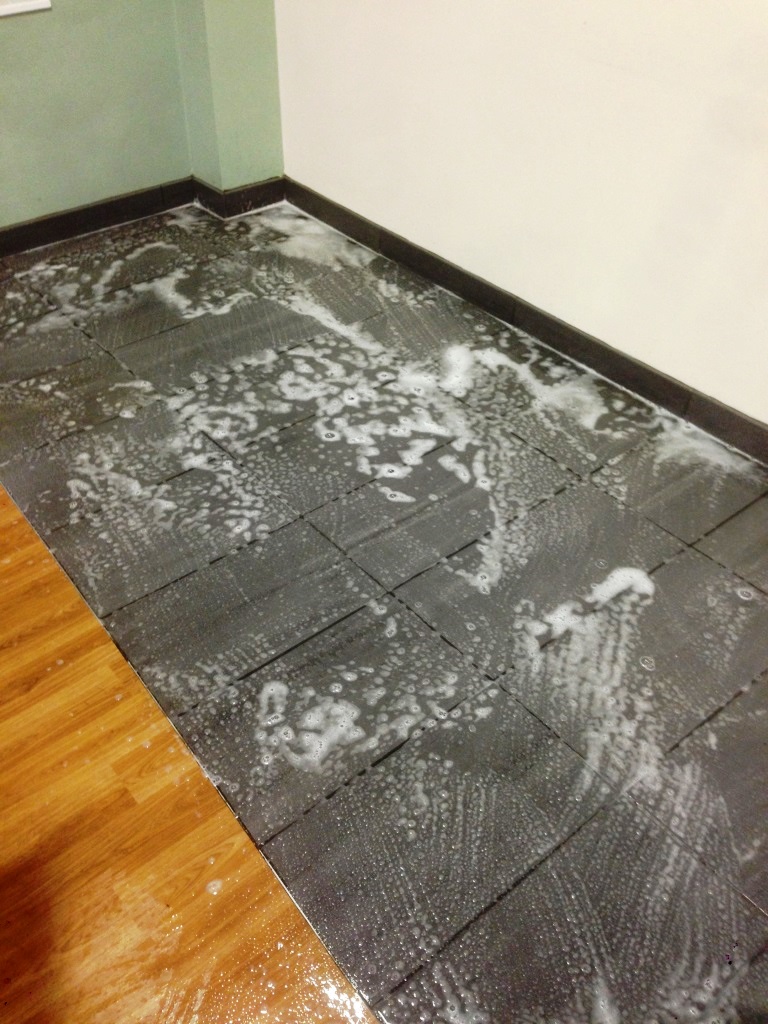
Working in small sections, I used a spray gun to coat the floor with this cleaning solution, before leaving this to dwell for roughly 20 to 30 minutes. The solution was then scrubbed in to the tiles using a black buffing pad attached to a 17″ scrubbing machine. The resulting cleaning residue was then promptly removed using a wet-vac machine.

Deep Cleaning Porcelain Tiled Floor Cottingham Hospital

Cleaning the grout

After completing the tile cleaning and inspecting the floor to ensure all dirt and stains had been removed, I paid special attention to the grey grout lines. I opted to use a solution of Tile Doctor Grout Clean Up diluted with clean water. The ratio in this instance was roughly twenty per cent Grout Clean up to eighty per cent water.

Deep Cleaning Porcelain Tiled Floor Cottingham Hospital
Grout Clean Up is an acid-based product designed to penetrate beneath the surface of the grout to remove grout smears and mineral deposits, including rust. It is recommended for use on masonry surfaces and acid resistant stone such as Porcelain, Ceramic, Sandstone and Slate. Once both the tiles and the grout had been individually cleaned, I gave the floor a thorough rinse with clean water to remove any trace of product. All fluids were extracted using a wet vacuum.

Deep Cleaning Porcelain Tiled Floor Cottingham Hospital
Deep cleaning the entire Porcelain floor took some time but the was certainly worth the effort, the tiles now look so much cleaner and the grout a consistent shade of grey.

Deep Cleaning Porcelain Tiled Floor Cottingham Hospital
 

Large Porcelain Tiled Floor deep cleaned at a Hospital in Hull

Deep Cleaning Porcelain Floor tiles at an NHS Hospital in Cottingham Read More »

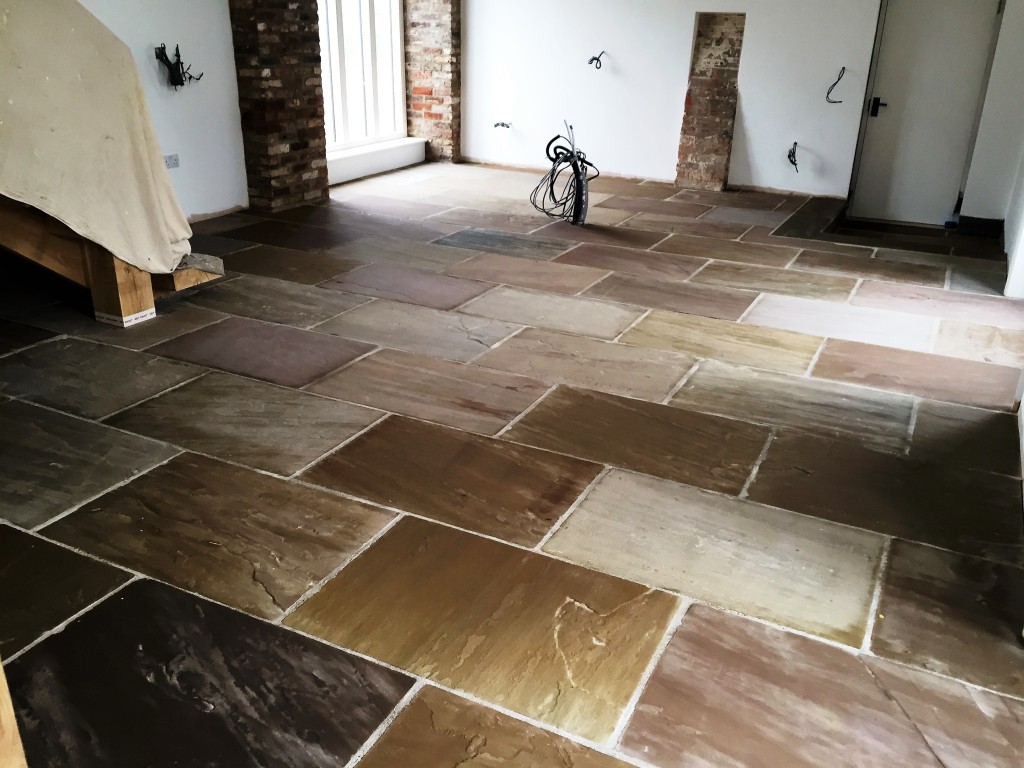
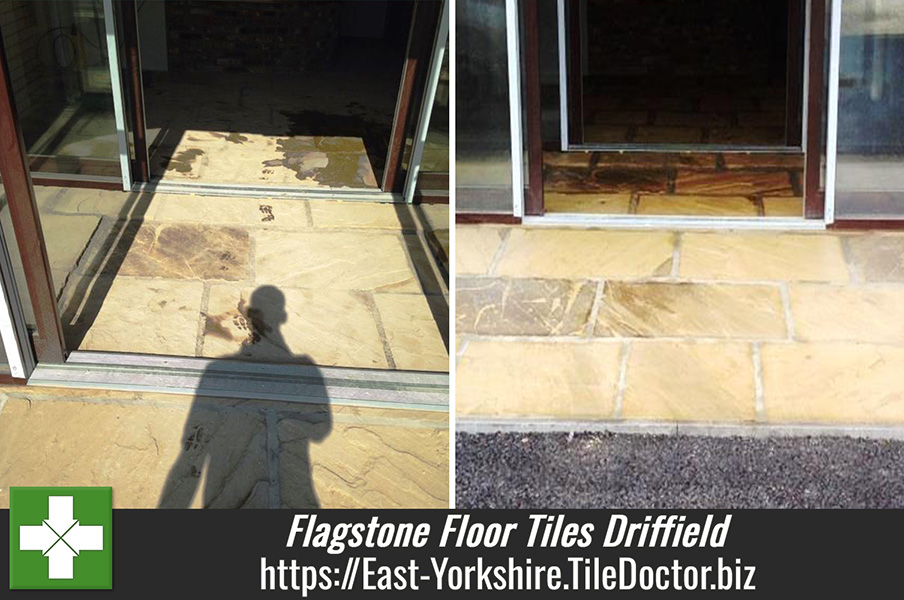
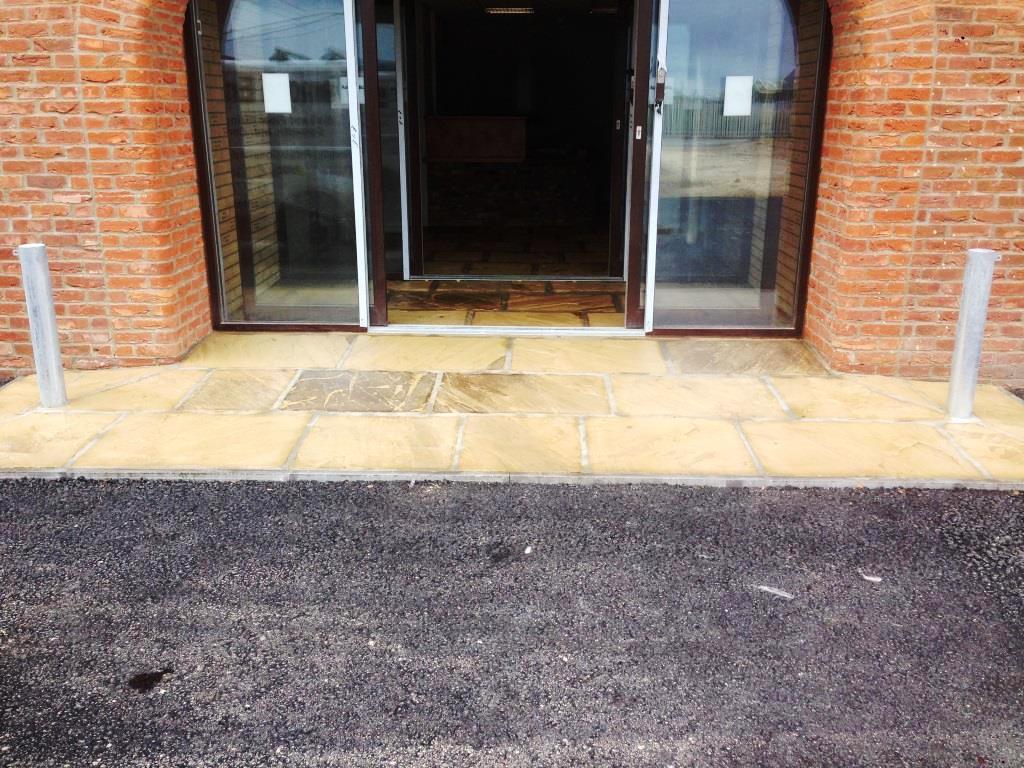
Flagstone Floor in Driffield Farm Office After Sealing

Farm Office Flagstone Floor Tiles Cleaned and Sealed in Driffield

We work on a lot of residential tile installations but also cover commercial properties too, such as this new farm office which was in the process of being built in the market town of Driffield, East Yorkshire where a Flagstone tiled floor had been laid at the entrance. Driffield is known as the ‘Capital of the Yorkshire Wolds’ and lies near the source of the River Hull.

The farm office project was very big and, with the pressure on to complete it in time, the floor had been laid without being sealed first. As a result, the floor was getting dirty very easily, and was proving difficult to keep clean. It was clear that the Flagstone tiles would need to be cleaned and sealed, and I was called upon to get the job done.

Flagstone Floor in Driffield Farm Office Before Sealing Flagstone Floor in Driffield Farm Office Before Sealing

Cleaning dirty Flagstone floor tiles

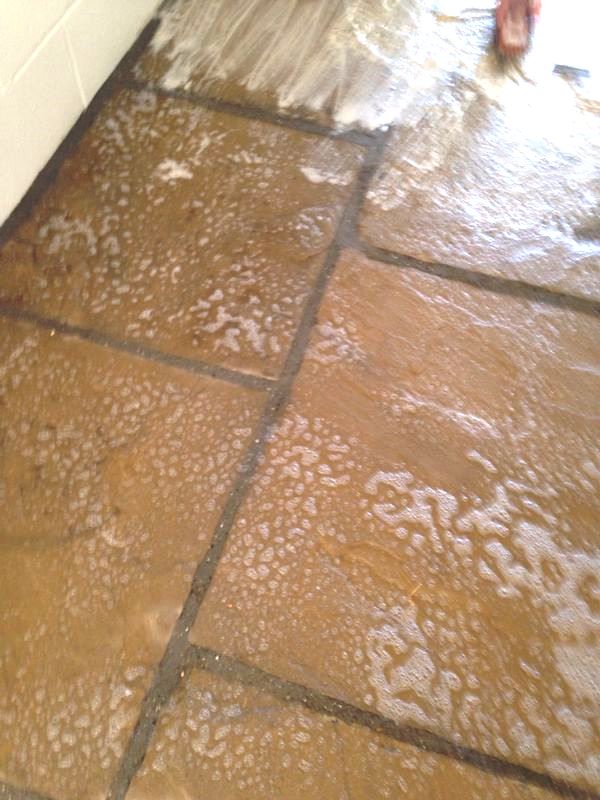
To clean the floor I first mixed a 50:50 solution of clean water and Tile Doctor Pro Clean. Pro Clean is a high-alkaline cleaner which is safe to use on a wide range of natural stone floors. The cleaning solution was worked in using a rotary machine fitted with a black buffing pad which proved an effective method, lifting off the dust and residue that had been left on the surface of the Flagstone tiles during the course of construction work.

Flagstone Floor in Driffield Farm Office During Cleaning
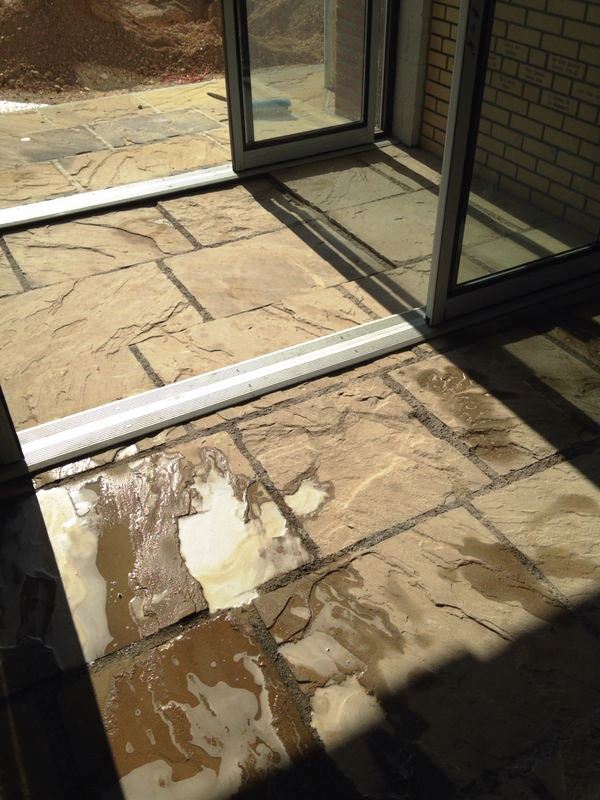
The excess residue was extracted using a wet-vac machine. I then repeated the whole process over again several times in order to get the floor as clean as possible.

Flagstone Floor in Driffield Farm Office After Cleaning

Sealing the Flagstone tiled floor

To seal the floor I used a combination of two different Tile Doctor sealers. Firstly, I applied a layer of Tile Doctor Colour Grow to the floor. This colour intensifying sealer is specially formulated to enhance the fantastic natural colours in the stone, while at the same time providing durable surface protection.

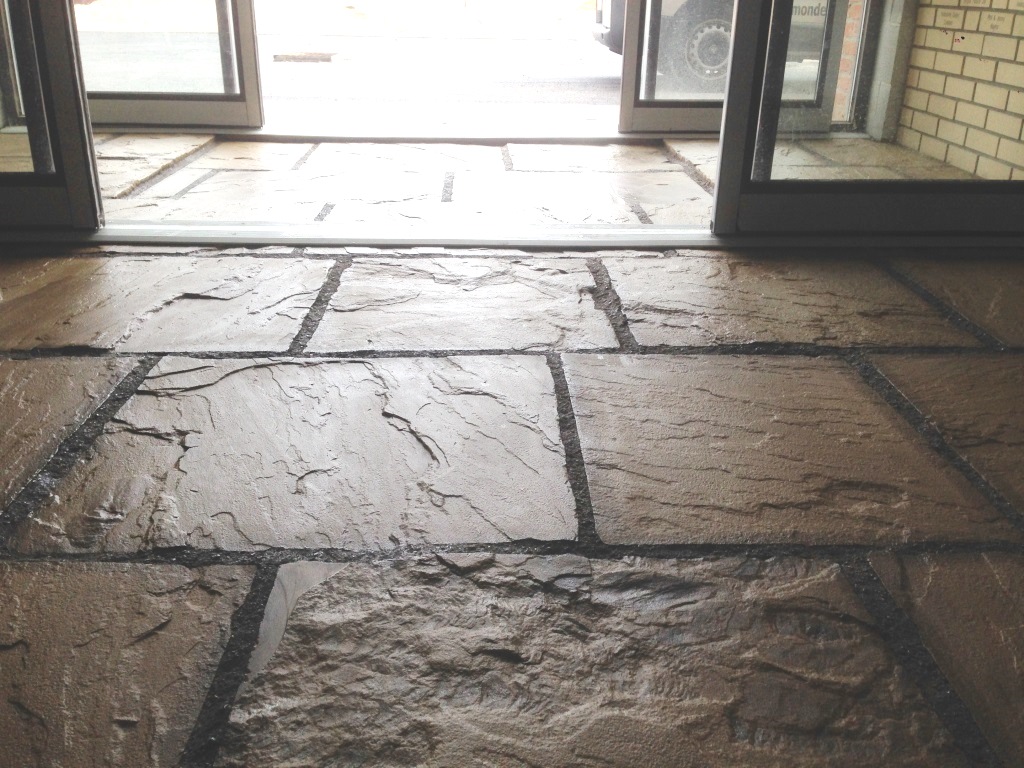
The floor was then finished off with a couple of coats of Tile Doctor Seal & Go. This added to the stain resistance of the floor, while also delivering a very nice subtle shine on the surface.

Flagstone Floor in Driffield Farm Office After Sealing
All signs of building work have been removed from the stone floor and it is now looking presentable ready for the opening of the new office, the combination sealer applied to the floor will also make sure it stays that way for some time to come.

Flagstone Floor in Driffield Farm Office After Sealing
 

Flagstone floor cleaning in East Yorkshire Office

Farm Office Flagstone Floor Tiles Cleaned and Sealed in Driffield Read More »

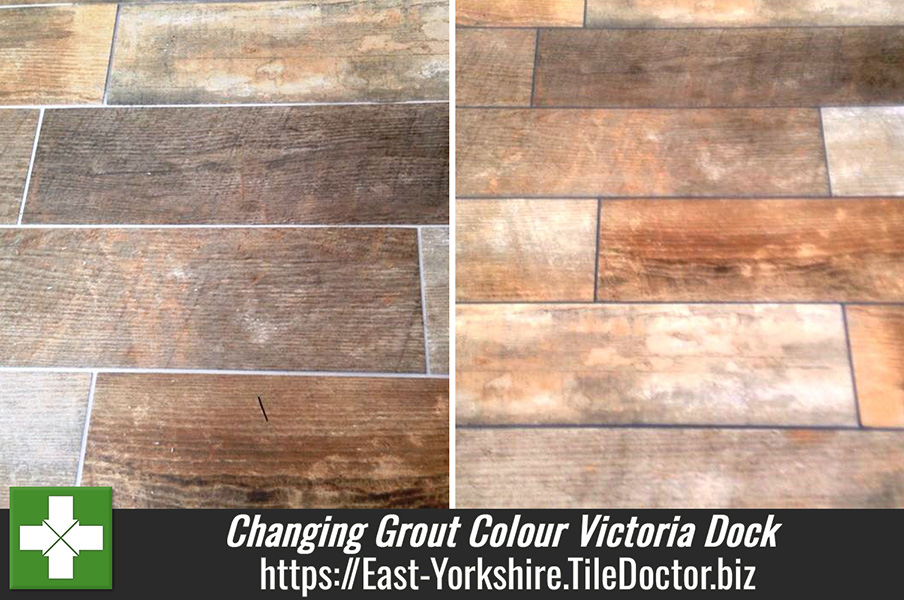
Changing Grout Colour on Wood Effect Tiles in Hull Step

Changing the Colour of Grout on a Wood Effect Floor in Victoria Dock

I recently went down to the city of Hull, the biggest in East Yorkshire, for this job after I was contacted by a client living in the Victoria Dock area. My client had a very nice wood effect Porcelain floor, but she was not happy with current colour of the grout, which was a light grey, and wanted it changed to a dark grey instead. The floor was very well maintained – with Porcelain being a highly resistant material – and so it did not require a deep clean itself. On this particular occasion, my main focus was on the grout.

Changing Grout Colour on Wood Effect Tiles in Hull Step 2

Applying the pre-treatment cleaner

The Tile Doctor Grout Colourant kit consists of a pre-treatment cleaner and the colour seal, along with a grout brush and scrub pad to apply the products. My first task was to apply the pre-treatment cleaner to the grout. This prepares the grout joints for a superior grout colourant bond.

Changing Grout Colour on Wood Effect Tiles in Hull Step 1
Once sprayed on to grout, the pre-treatment cleaner was left to sit for 1-2 minutes before being worked in with the nylon grout brush. Any excess cleaner and dirt was then rinsed off with clean water to prepare the grout for re-colouring.

Changing the grout colour

The next stage of the re-colouring was to apply the grout colourant itself. I applied the dark grey colourant very carefully using an applicator brush, ensuring that it was distributed as evenly as possible along the grout lines.

Changing Grout Colour on Wood Effect Tiles in Hull Step 3 Changing Grout Colour on Wood Effect Tiles in Hull Step 4

I then left the grout to dry for a couple of hours, before using clean water in combination with a scrub pad to remove the excess. As you can see from the photographs, the overall result was a whole new look for the floor, with the dark grey colour accentuating the fantastic wood effect Porcelain, more so than the light grey had done previously.

Changing Grout Colour on Wood Effect Tiles in Hull Step 5
Both myself and my client were very pleased with a job well done.

Changing Grout Colour on Wood Effect Tiles in Hull Step 6
 

Re-colouring the grout on wood effect floor in Victoria Dock

Changing the Colour of Grout on a Wood Effect Floor in Victoria Dock Read More »
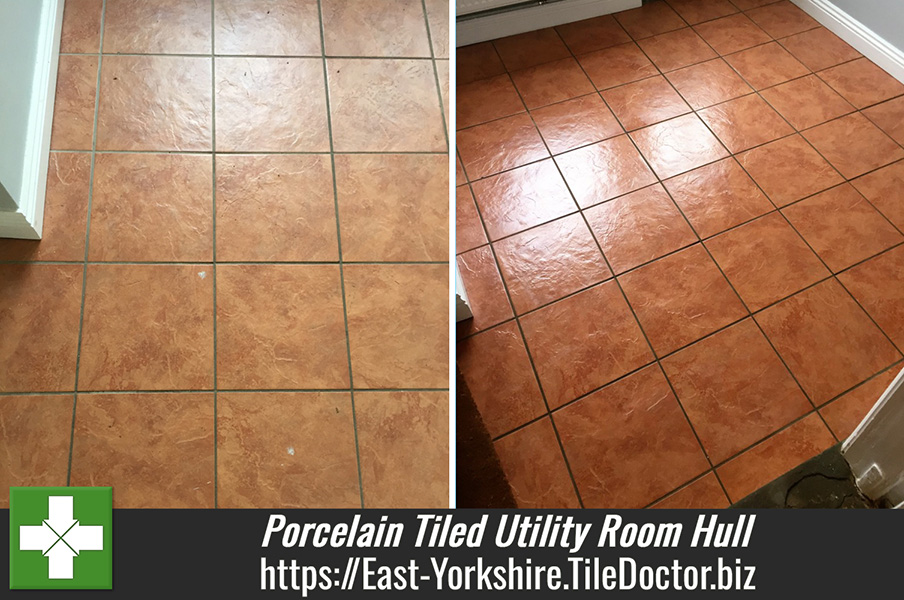
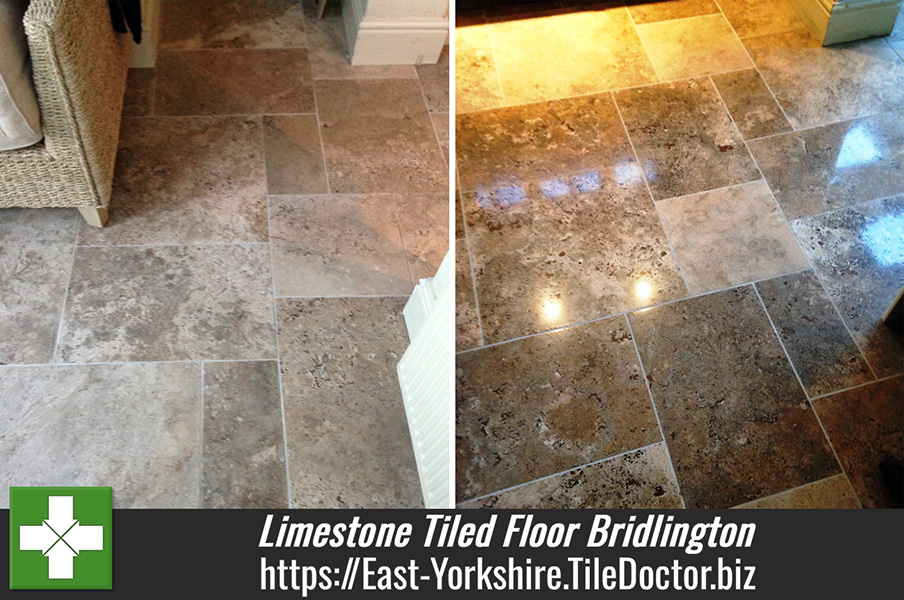
Limestone Tiled Floor Bridlington After Burnishing

Limestone Tiled Floor Cleaned and Sealed in Bridlington

I was recently contacted by a client who lives in the small coastal town of Bridlington, East Yorkshire. Bridlington has a small sea fishing port known for its great shellfish.

My client had a Limestone floor that was really in need of a fresh up: over the years the tiles had become dull and worn-looking, and she was keen to restore a nice shine to the surface. I was on hand to treat the floor to a much needed clean, polish and seal.

Limestone Tiled Floor Bridlington Before Burnishing Limestone Tiled Floor Bridlington Before Burnishing

Cleaning and polishing a Limestone tiled floor

My first job was to strip off the old sealer. I did this using a coarse diamond burnishing pad fitted to a rotary machine. The floor was then given a thorough rinse with clean water to clear off any dirt and excess sealer. Following this, the excess water was quickly soaked up with a wet-dry vac machine to make sure there was no leftover moisture, as this could have potentially affected the performance of the new sealer (which I would apply at a later stage).

To polish the floor I continued with the system of burnishing pads, starting first with a medium burnishing pad, followed by the fine and very fine pads to achieve the desired effect. The result was a very nice overall sheen.

Sealing a Limestone tiled floor

After cleaning and polishing, the only task remaining was to provide the floor with a durable seal. I did this using Tile Doctor Ultra Seal, which is a premium, natural-look penetrating sealer that is specially designed to provide maximum stain protection from within. This particular product is suitable for use on a range of different natural stone floors, including Limestone, Slate, Granite, Marble and Travertine.

Limestone Tiled Floor Bridlington After Burnishing Limestone Tiled Floor Bridlington After Burnishing

Overall, my client was very happy with the results. As you can see from the photographs, the clean, polish and seal made a marked difference on the condition of the floor, turning the tiles from dull and lifeless to full of character and colour once again.

Renovating Limestone Floor Tiles in East Yorkshire

Limestone Tiled Floor Cleaned and Sealed in Bridlington Read More »
Grout Clean and colour in Beverly After

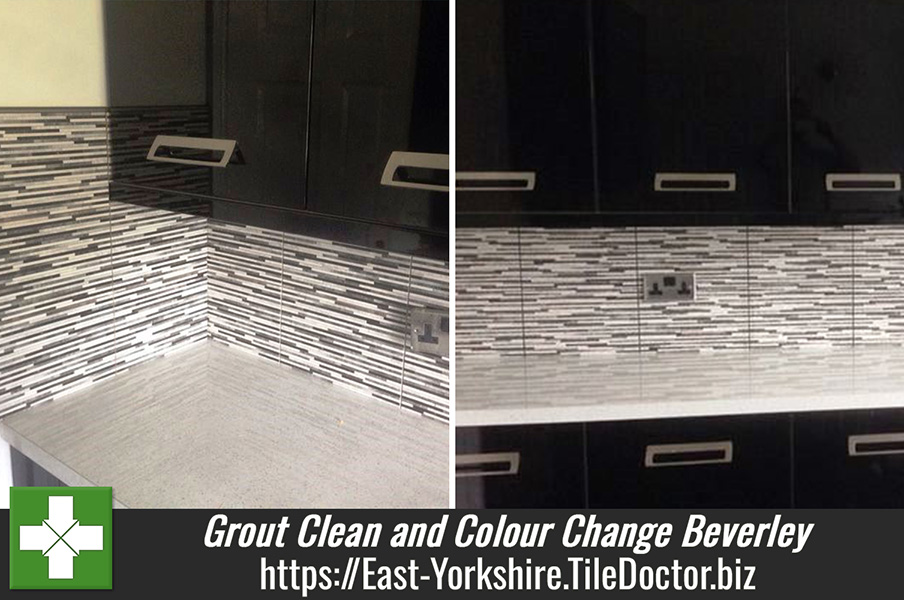
Grout Clean and Colour change for Kitchen wall tiles in Beverley

This was a request from lady in the market town of Beverley, East Yorkshire which, interestingly, is actually the influence for the name of the famous Beverley Hills area in California. She was unhappy with the colour of grout that had been used on kitchen wall tiles installed as part of her new kitchen and had called Tile Doctor to see if anything could be done.

She had spent a lot of time deciding on what tiles she wanted, and unfortunately the tiling company that installed them used the wrong colour grout. She thought that the job was completely ruined, and that, in the worst case, the grout would need to be removed. However, after a short consultation with the client, she decided on her a deep clean for her grout, along with a change of colour – from grey to black.

Grout Clean and colour in Beverly Before

Cleaning the grout

The Tile Doctor grout colour change kit includes a pre-treater cleaner which is used to clean the grout joint and prime it ready for the colourant. The pre-treatment cleaner is applied and left so soak in for a short period before being scrubbed into the grout with a brush. This helps to penetrate below the surface, lifting any dirt and stains before being rinsed off with water.

Changing the grout colour

After cleaning the grout, I applied the black colourant which is simply applied in thin even coats using a small brush. You need to take care not to get any on the tile and to wipe it off immediately if you do. The colourant sets quite quickly in around two hours but needs to be kept dry for twenty four hours.

Grout Clean and colour in Beverly During Grout Clean and colour in Beverly After

After the job was done, the change in colour left the wall tile with a whole new look – the one my client had hoped for to begin with. It’s probably difficult to appreciate this from the photographs but I was very pleased to have helped to remedy this problem quickly and with relative ease. Another happy client!

Grout Clean and colour in Beverly After
 

Changing the colour of grout on wall tiles in Yorkshire

Grout Clean and Colour change for Kitchen wall tiles in Beverley Read More »
=================================

East Yorkshire Tile Doctor

================================= Read More »
Scroll to Top